DIY Bitcoin ATM: an educational Lightning ATM built with recycled hardware
For most people, Bitcoin is still hard to understand. Not because it is especially complex, but because it is entirely digital. You can’t touch it, you can’t see it, and you almost always experience it through a screen.
Usually, the first contact with Bitcoin happens on an exchange. You buy it online and it appears as just another number in an account. That experience doesn’t help you understand what is really happening or what makes it different from traditional money, and it creates a sense of distance that makes adoption even harder.
The lack of a physical experience makes Bitcoin feel abstract. Without tangible interaction, it’s difficult to internalize it and explain it in simple terms. That’s exactly where the need arises to bring Bitcoin into the real world and make it visible through direct experience.
The idea: a DIY Bitcoin ATM to learn using real coins
The idea was simple: build a DIY Bitcoin ATM (do it yourself) that would allow anyone to experience Bitcoin directly, without prior knowledge or technical explanations. A physical device that connects an everyday action with the real operation of the network.

Value 4 value⚡️
If the content has been useful to you, please consider supporting me so that I can create more articles like this. Lightning address (only for Lightning payments): [email protected]
The ATM works as a bridge between the physical world and Bitcoin. The user inserts a coin, the system detects it, and once the operation is finished, the user receives satoshis directly in their wallet via the Lightning Network. In just a few seconds, a physical coin turns into real Bitcoin.
ℹ️ A satoshi (or sat) is the smallest unit of Bitcoin (BTC), equal to one hundred millionth of a Bitcoin (0.00000001 BTC).
This approach turns learning into a hands-on experience. There’s no need to talk about nodes, blocks, or private keys. The person sees something happen, understands that value has been exchanged, and walks away with Bitcoin in their own wallet.
The goal of the project is not to sell Bitcoin or provide a financial service, but to educate. It’s a tool designed for workshops, meetups, events, or simply to show friends and family how Bitcoin works in a clear and accessible way.
Lightning Network is key in this context. It enables instant, very low-value payments, which is essential for making exchanges with physical coins practical and immediate. Without Lightning, this experience would not be possible.
ℹ️ Lightning Network is a second-layer protocol built on top of Bitcoin that enables instant off-chain payments.
The heart of the project: LightningATM and the educational approach
After researching different options to build a DIY Bitcoin ATM, I came across an open-source project called LightningATM. From the very beginning it matched exactly what I had in mind: a simple, functional ATM designed specifically for education.
LightningATM is not meant to be a commercial ATM or an industrial solution. Its purpose is to demonstrate, in a practical way, how Bitcoin works through the Lightning Network. It only accepts physical coins and converts them into small amounts of satoshis, just enough to make the experience immediate and understandable.
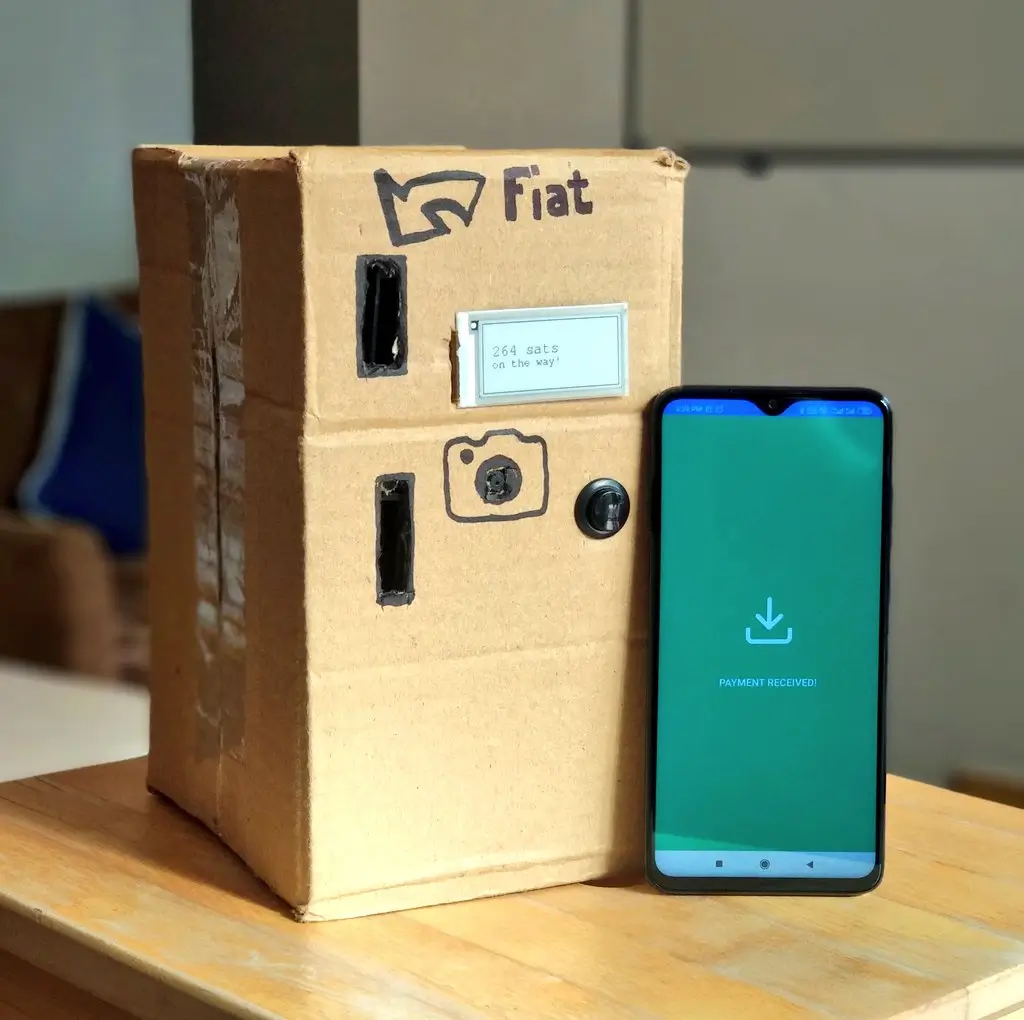
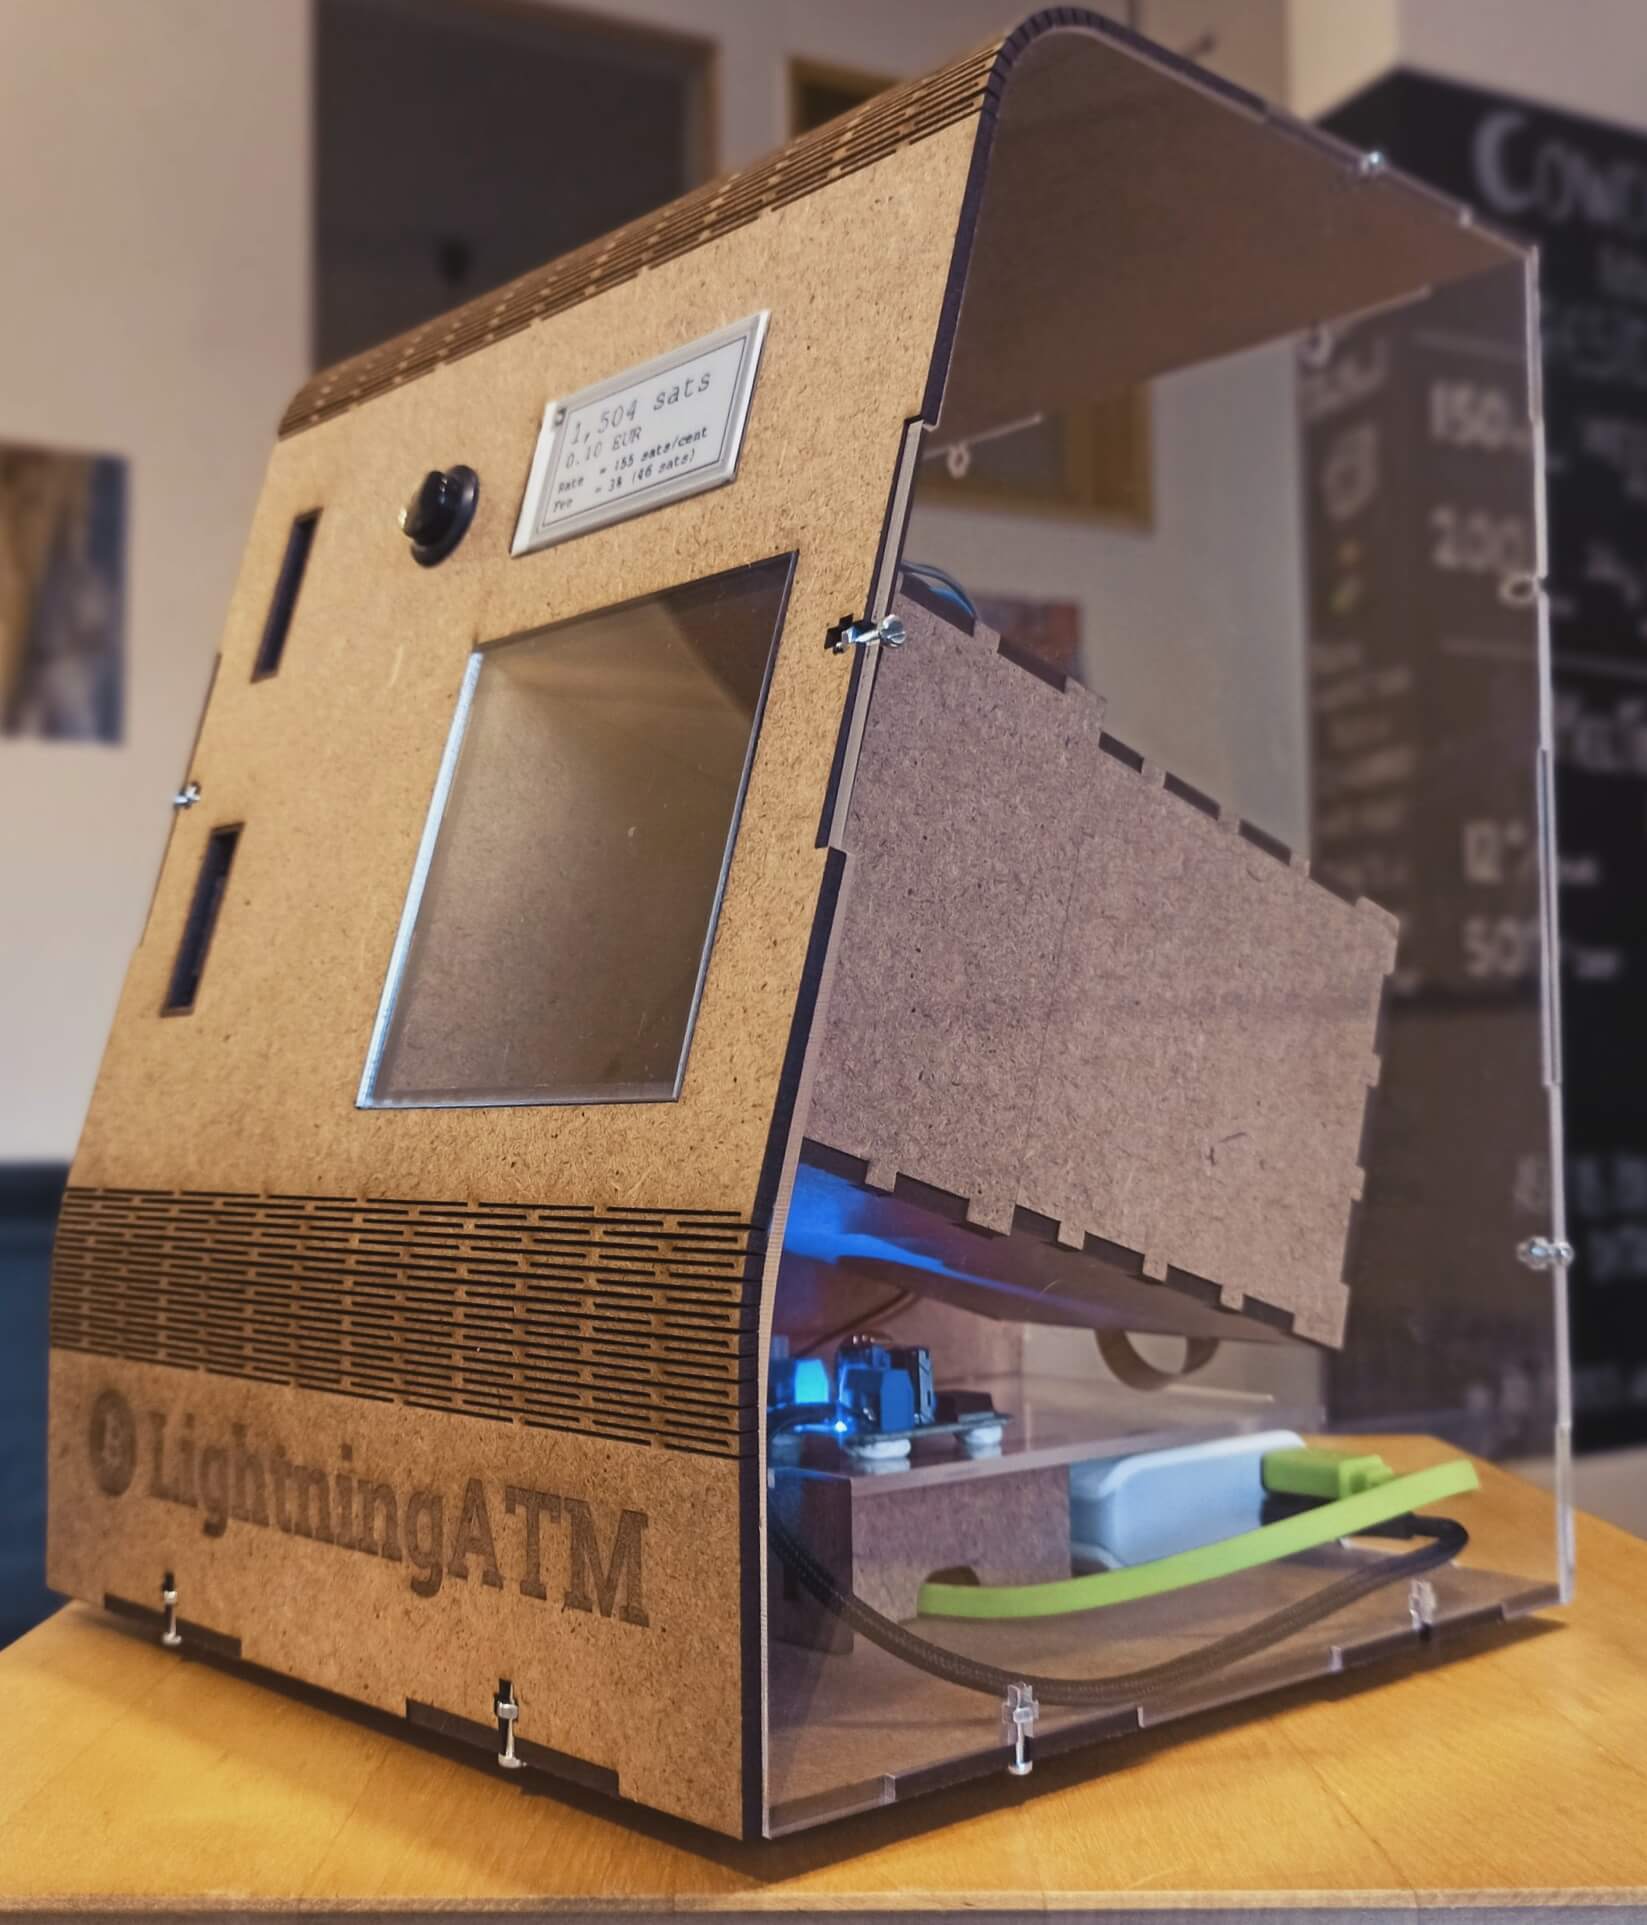
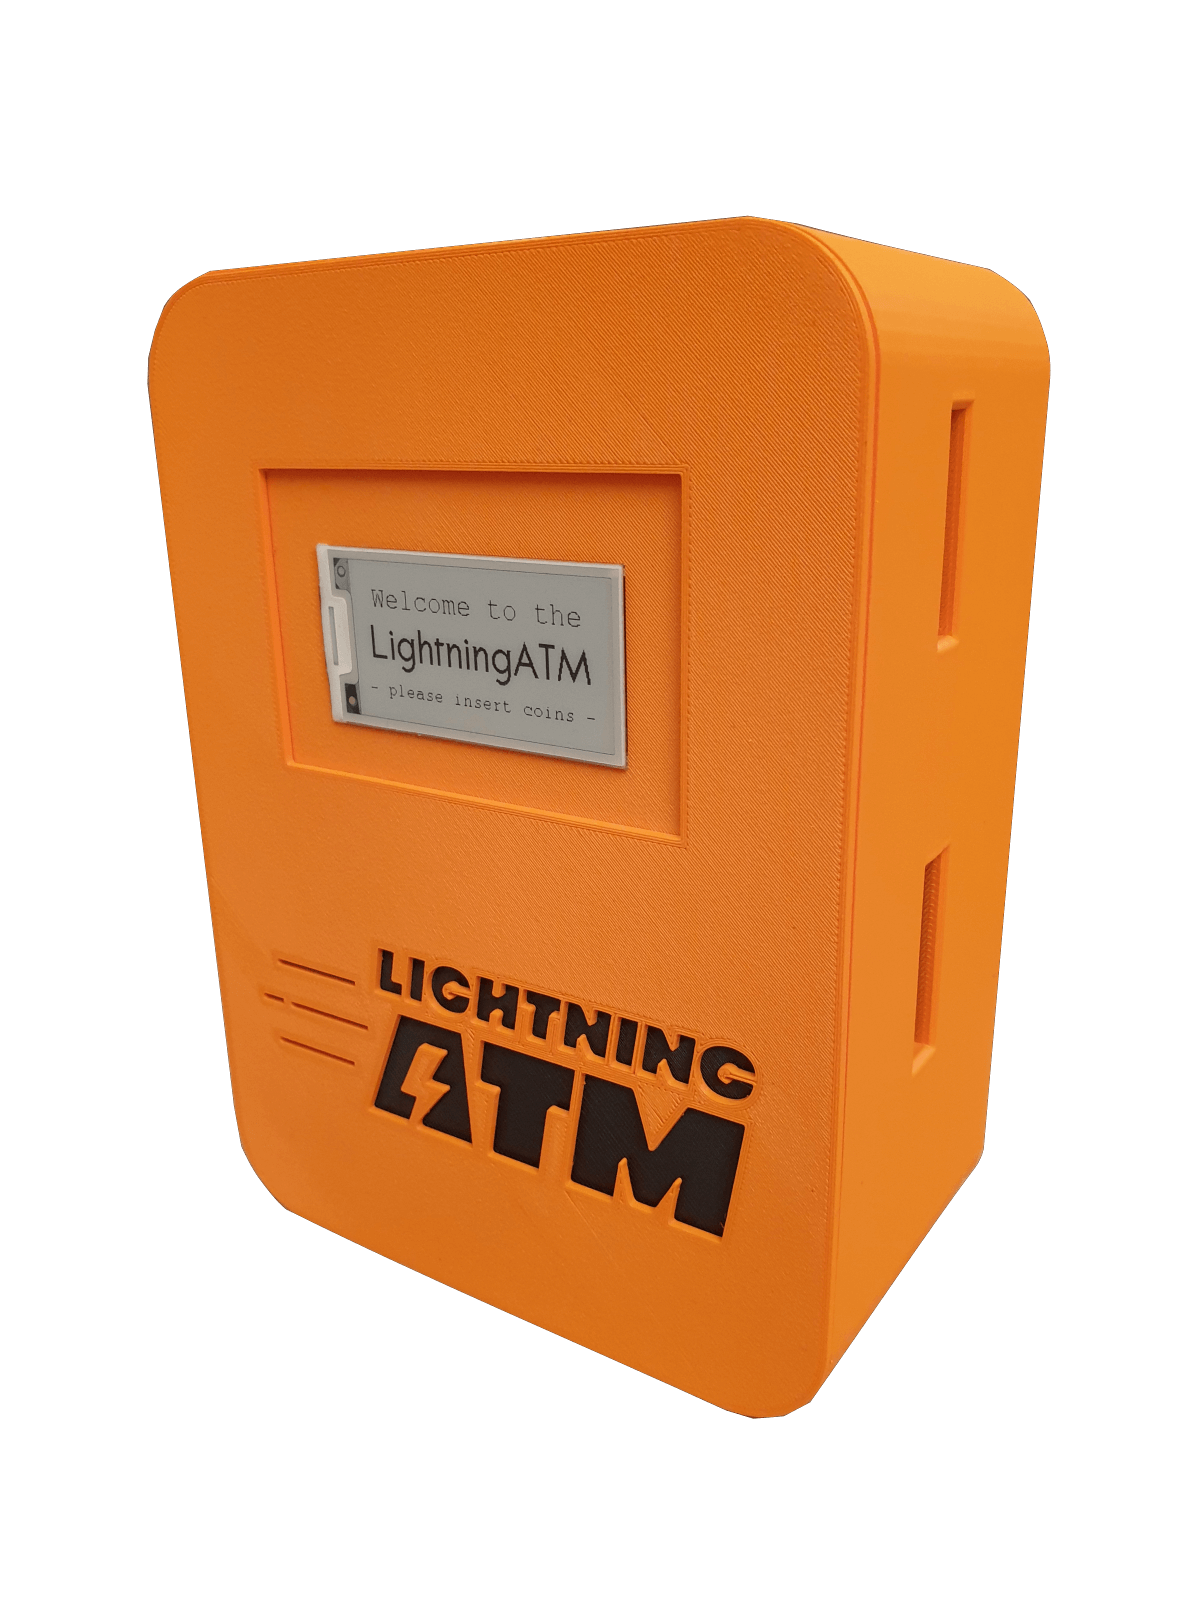
One of the aspects that caught my attention most was the evolution of the project itself. Early versions were built in cardboard boxes, almost like an improvised experiment, and over time they incorporated improvements, eventually reaching more refined designs, even with 3D-printable enclosures. That maker mindset—iterative and without commercial ambitions—fit perfectly with the spirit of this project.
It’s important to emphasize that the authors themselves make it clear this is a hobby project. It’s not designed to withstand attacks or operate in professional environments. And that’s not a weakness, but a conscious decision: prioritizing simplicity and learning over extreme robustness.
During the research phase I also considered other alternatives, such as the DIY ATMs from Bleskomat. It’s a very solid open-source project, with a more advanced approach and aimed at more complete deployments. It’s definitely worth exploring, although in my case I was looking for something more minimalist and focused exclusively on the educational experience.
Choosing LightningATM was a purpose-driven decision. I didn’t want the most complete or the most secure ATM, but the one that explained Bitcoin best with the fewest possible parts and concepts.
How the DIY Bitcoin ATM works
The ATM’s operation is intentionally simple. The idea is that anyone can understand what’s happening without needing technical knowledge of Bitcoin.
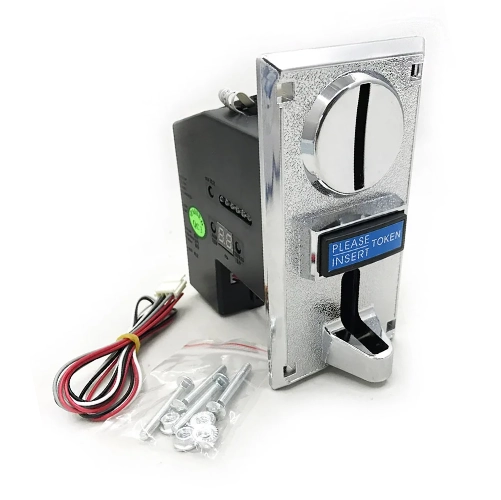
Everything starts when the user inserts a coin into the ATM. The coin acceptor detects the type of coin and sends a signal to the Raspberry Pi. Each coin is translated into a specific number of satoshis, calculated in real time based on the BTC/EUR exchange rate.
The user can insert as many coins as they like. The screen shows the accumulated value in satoshis in a clear and transparent way. When finished, the user presses a button to confirm the operation.
At that moment, the ATM generates a QR code. That QR represents the request to receive the accumulated satoshis. The user simply scans it with their Lightning wallet and, within seconds, the funds arrive in their wallet.
There are no accounts, no user records, and no intermediate steps. The ATM doesn’t “store” Bitcoin for the user; it simply facilitates the exchange between a physical coin and an immediate Lightning payment. The experience is direct and easy to follow, even for someone who has never used Bitcoin before.
This simple flow is exactly what makes the ATM a good educational tool. Each step is visible, logical, and easy to explain, which helps remove many of the common doubts around Bitcoin and digital payments.
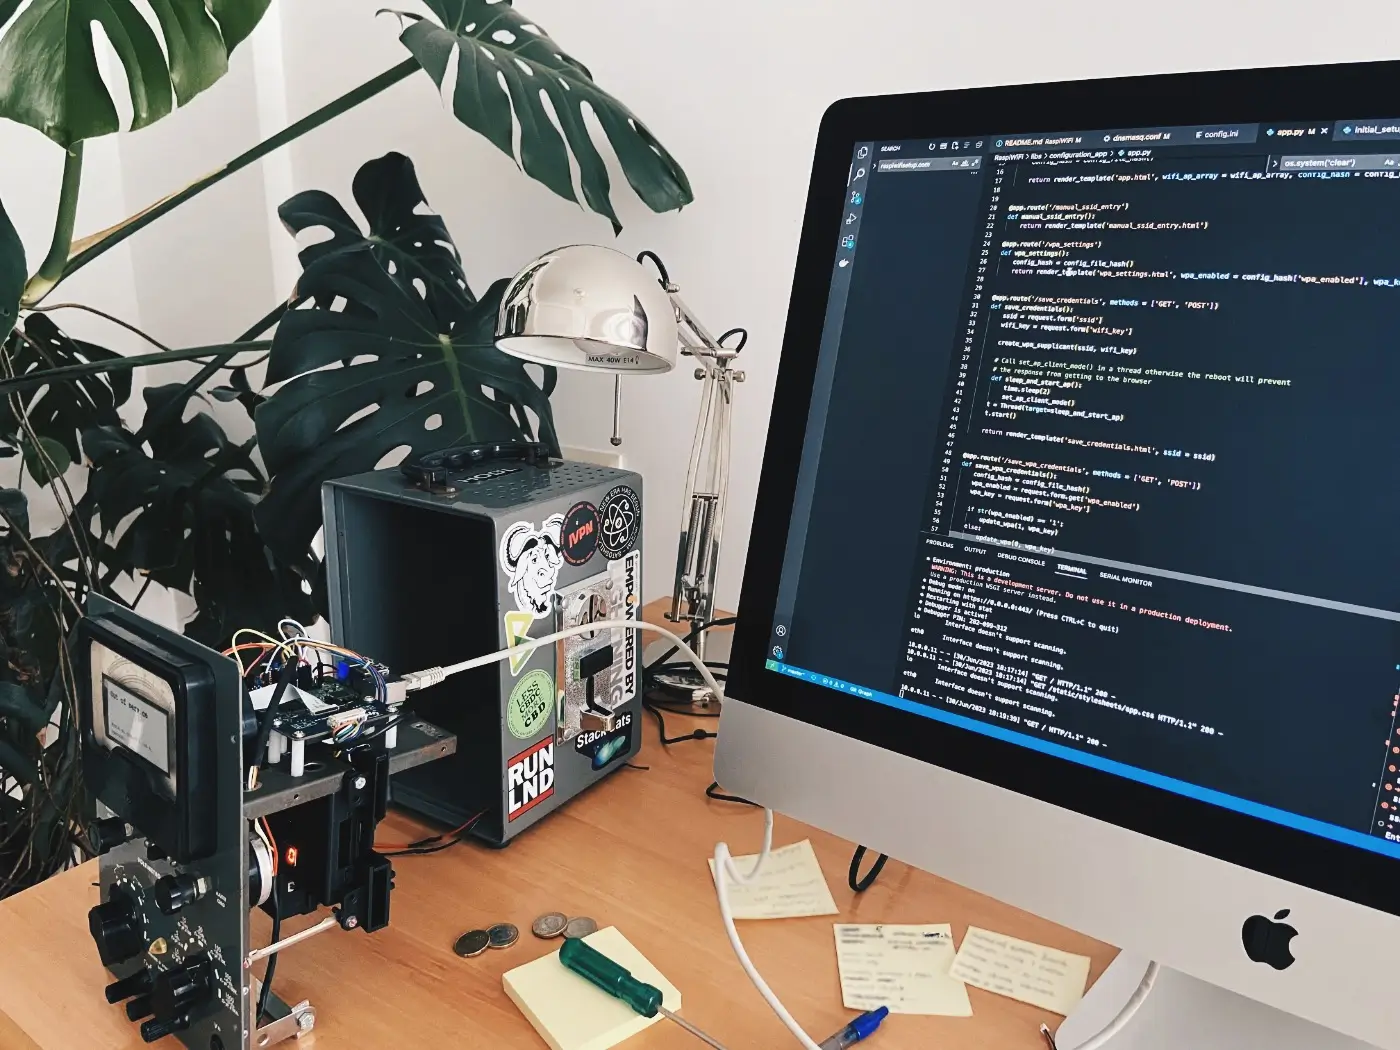
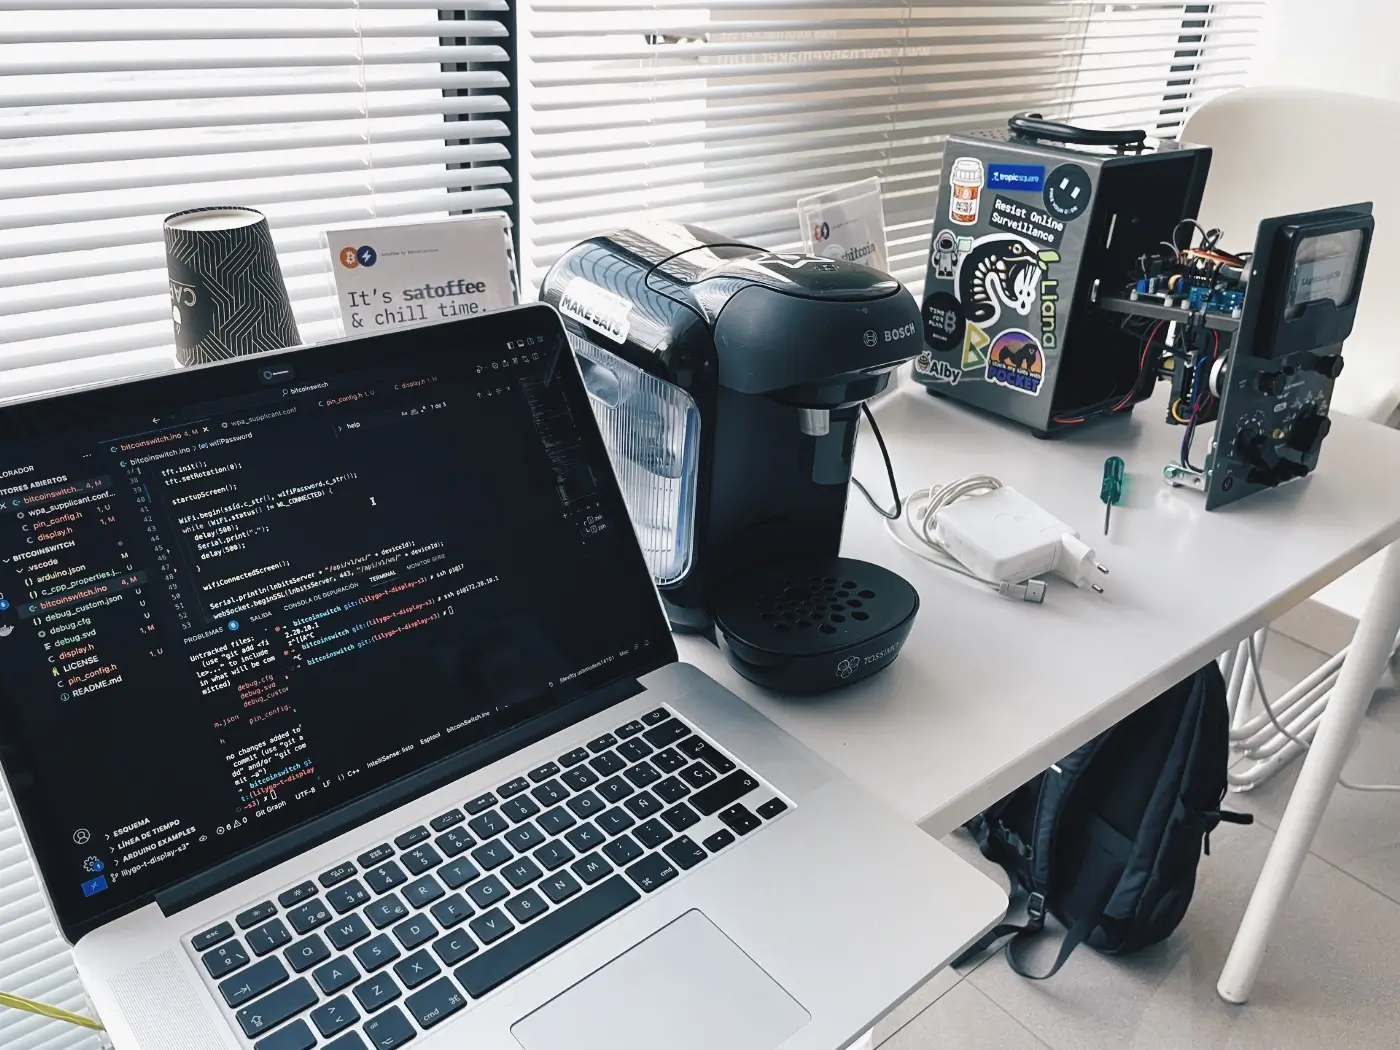
Software and hardware of the DIY Bitcoin ATM
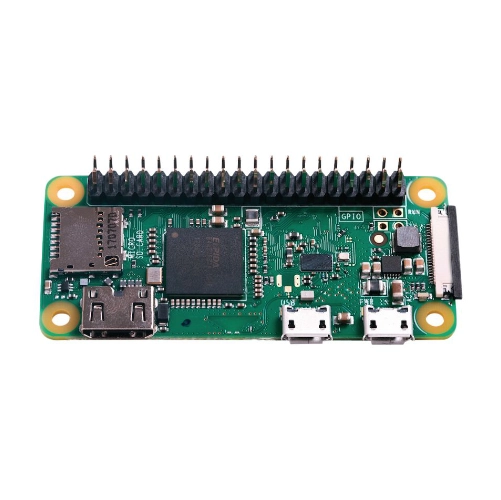
The ATM is built on a very simple and accessible hardware base. The core of the system is a Raspberry Pi, which handles the ATM logic, communicates with the peripherals, and displays information on the screen. This choice keeps costs low and makes it easy for anyone to replicate or modify the project.
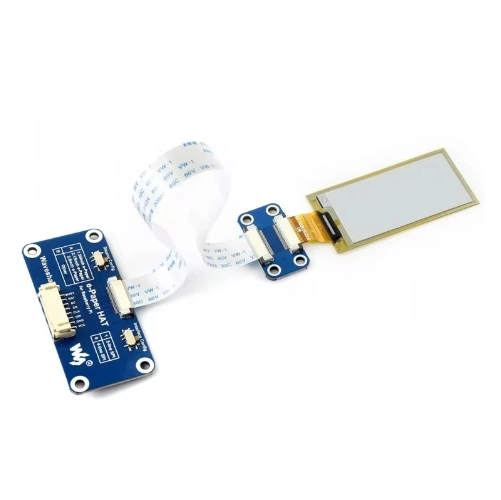
On the hardware side, each component has a very specific role: the coin acceptor detects insertions and sends electrical pulses, the display shows the operation status, and the button allows the user to confirm when they want to receive their satoshis. The entire system is designed so that every element has a clear and visible purpose.
On the software side, the LightningATM project runs directly on the Raspberry Pi and acts as an intermediary between the physical hardware and the Lightning network. The software interprets the coin acceptor signals, calculates the corresponding satoshi value in real time, and manages the generation of the QR code for withdrawing funds.
One advantage of this approach is flexibility. Parameters such as coin value, maximum limits per operation, or interface behavior can be easily adjusted. This makes it possible to adapt the ATM to different contexts, from quick demos to longer educational workshops.
Components list
Below is the complete list of components used to build the DIY Bitcoin ATM. All elements are easy to source and can be adapted depending on availability or personal preference.


| Part | Qty. | Cost | Origin | Notes |
|---|---|---|---|---|
| Raspberry Pi Zero WH o Raspberry 3b | 1 | 25 € | Aliexpress | Make sure it’s the WH version (with soldered headers) |
| Micro SD (16–32 GB) | 1 | 4,70 € | Aliexpress | |
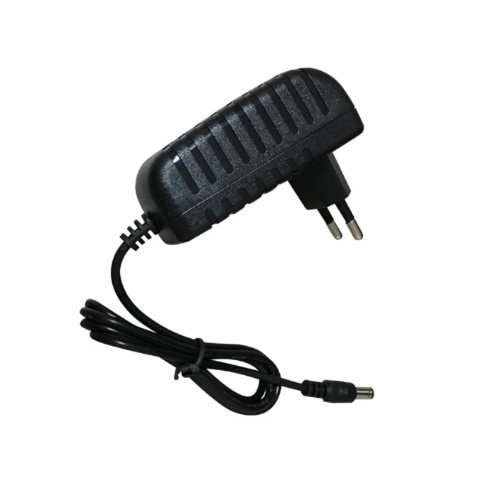
| 5V 2–3A power supply | 1 | 3,6 € | Aliexpress | |
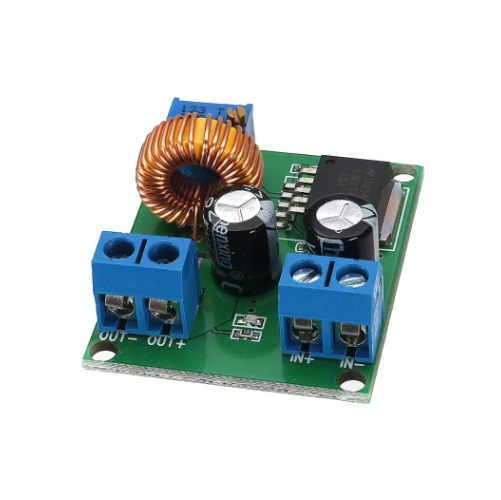
| DC-DC Step Up module (5V → 12V) | 1 | 2,2 € | Aliexpress | Adjustable for the coin acceptor |
| Arcade coin acceptor (12V) | 1 | 6,3 € | Aliexpress | Pulse-configurable |
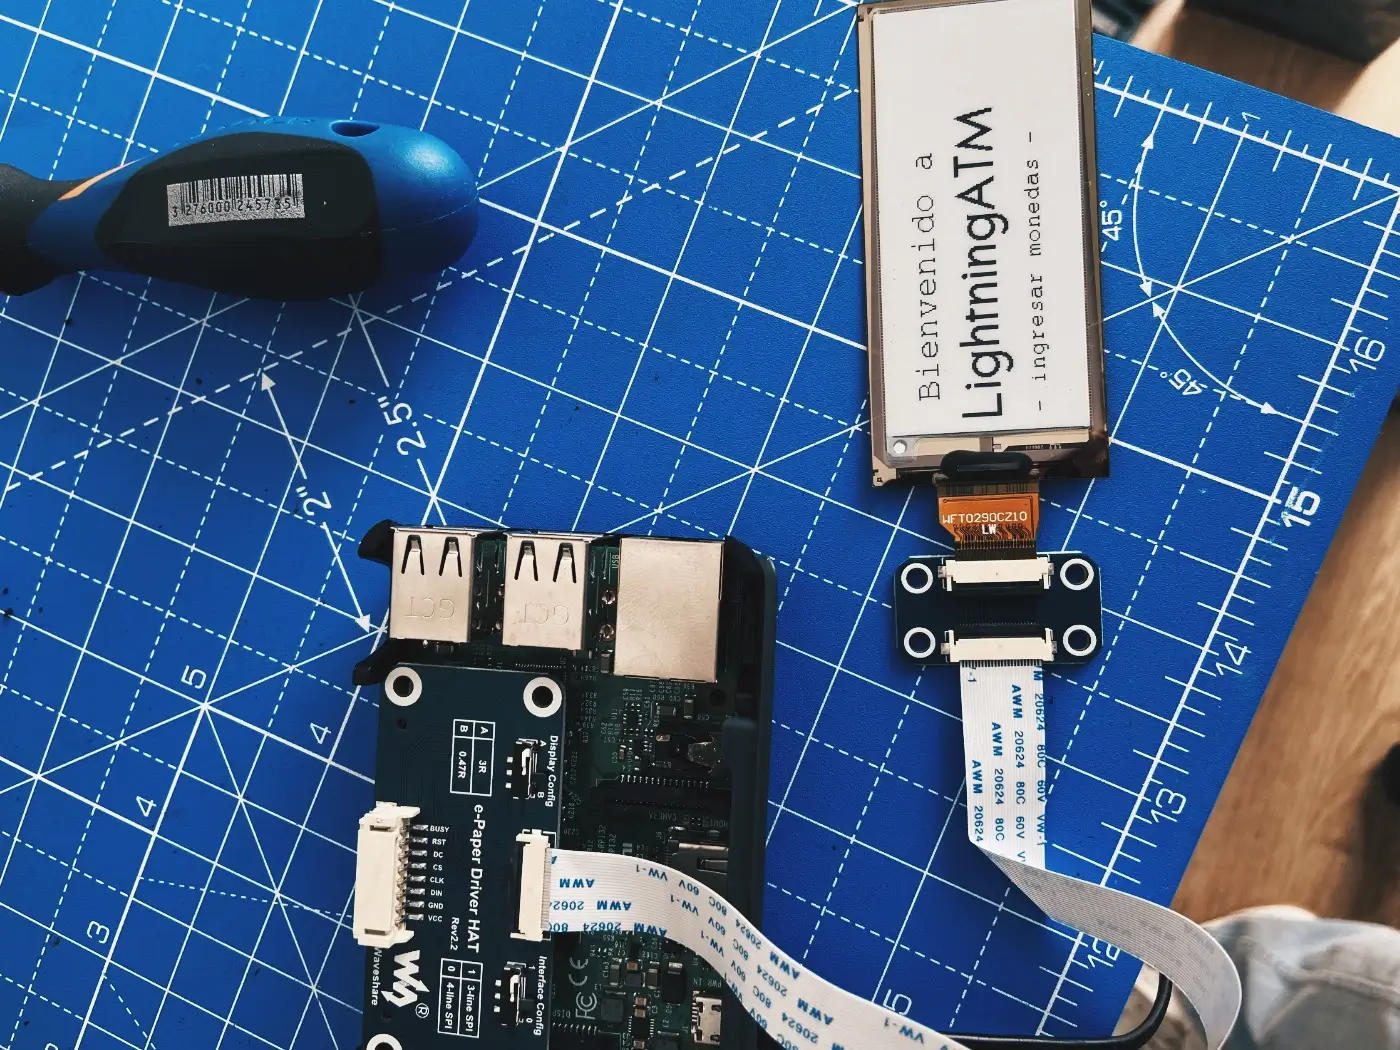
| Waveshare Raspberry Pi Display 2.13inch Flexible E-Ink Hat | 1 | 19 € | Aliexpress | |
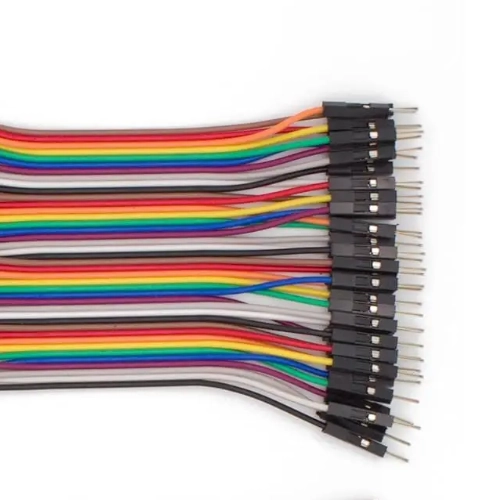
| Dupont cables | 1 pack | 3,4 € | Aliexpress | Buy male-to-male and mixed sets |
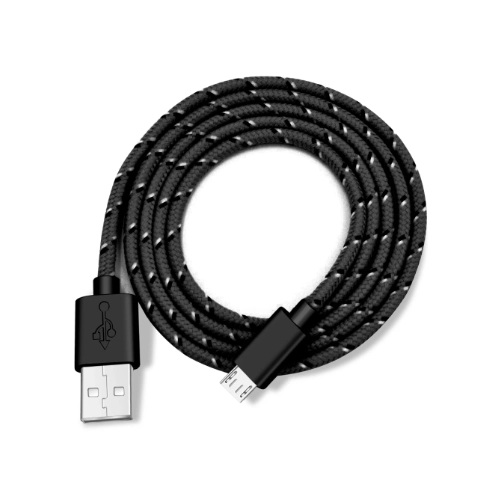
| Micro USB to USB A cable | 1 | 1,6 € | Aliexpress | For setup and maintenance |
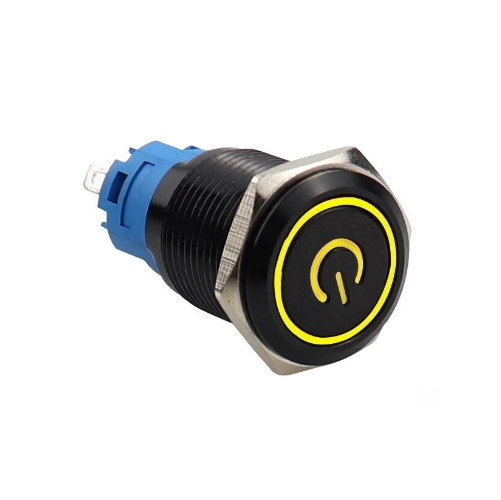
| Push button with LED | 1 | 1,6 € | Aliexpress | Yellow Ring Light, 12mm, 3-6V, Momentary Reset |
| Switch with LED | 1 | 1,6 € | Aliexpress | Yellow Power Light, 12mm, 3-6V, Self-lock with wire |
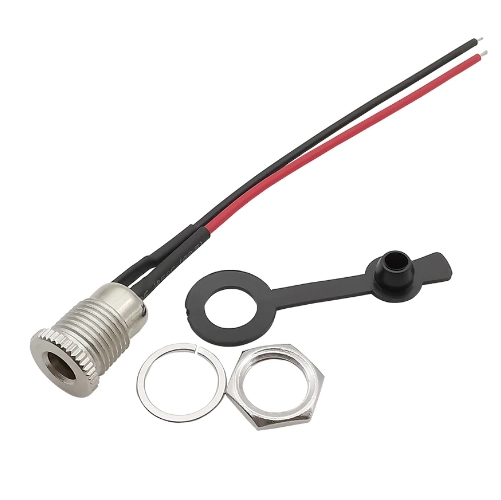
| Power connector | 1 | 1,26 € | Aliexpress | With 20 cm cable |
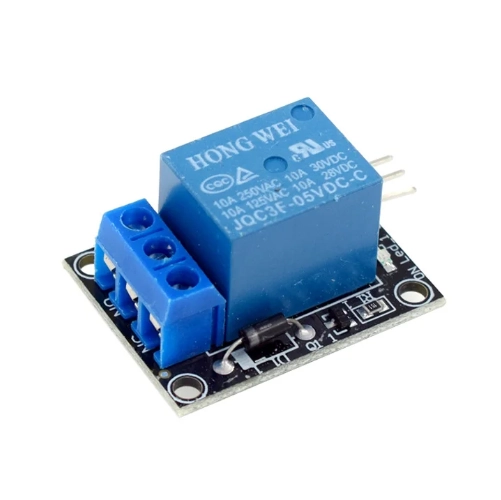
| KY-019 relay module | 1 | 1 € | Aliexpress | Additional control for the coin acceptor |
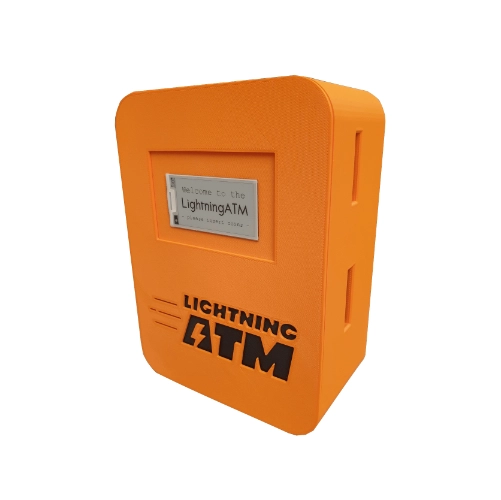
| Enclosure / recycled box or 3D-printed case | 1 | — | LightningATM |
Instructions to build your own ATM
The original project repository includes a detailed step-by-step guide to assemble and configure the DIY Bitcoin ATM from scratch. By following those instructions, it’s possible to build a fully functional ATM without additional modifications.
In my case, the final design includes some hardware and enclosure customizations, but the core system follows the original project instructions closely. Anyone who follows the guide can create their own educational ATM and later adapt it to their needs or aesthetic preferences.
The documentation covers everything from software installation to initial system setup, making it a solid starting point both for reproducing the project as-is and for using it as a base for experimentation.
Step-by-step installation guide:
https://github.com/21isenough/LightningATM?tab=readme-ov-file#installation-guideline
The challenge of creating a unique enclosure
From the start, I knew I didn’t want to mount the ATM in a generic box or a standard 3D-printed case. The project had an educational side, but also an emotional one. If I wanted to capture the attention of someone who knows nothing about Bitcoin, the object itself had to spark curiosity.
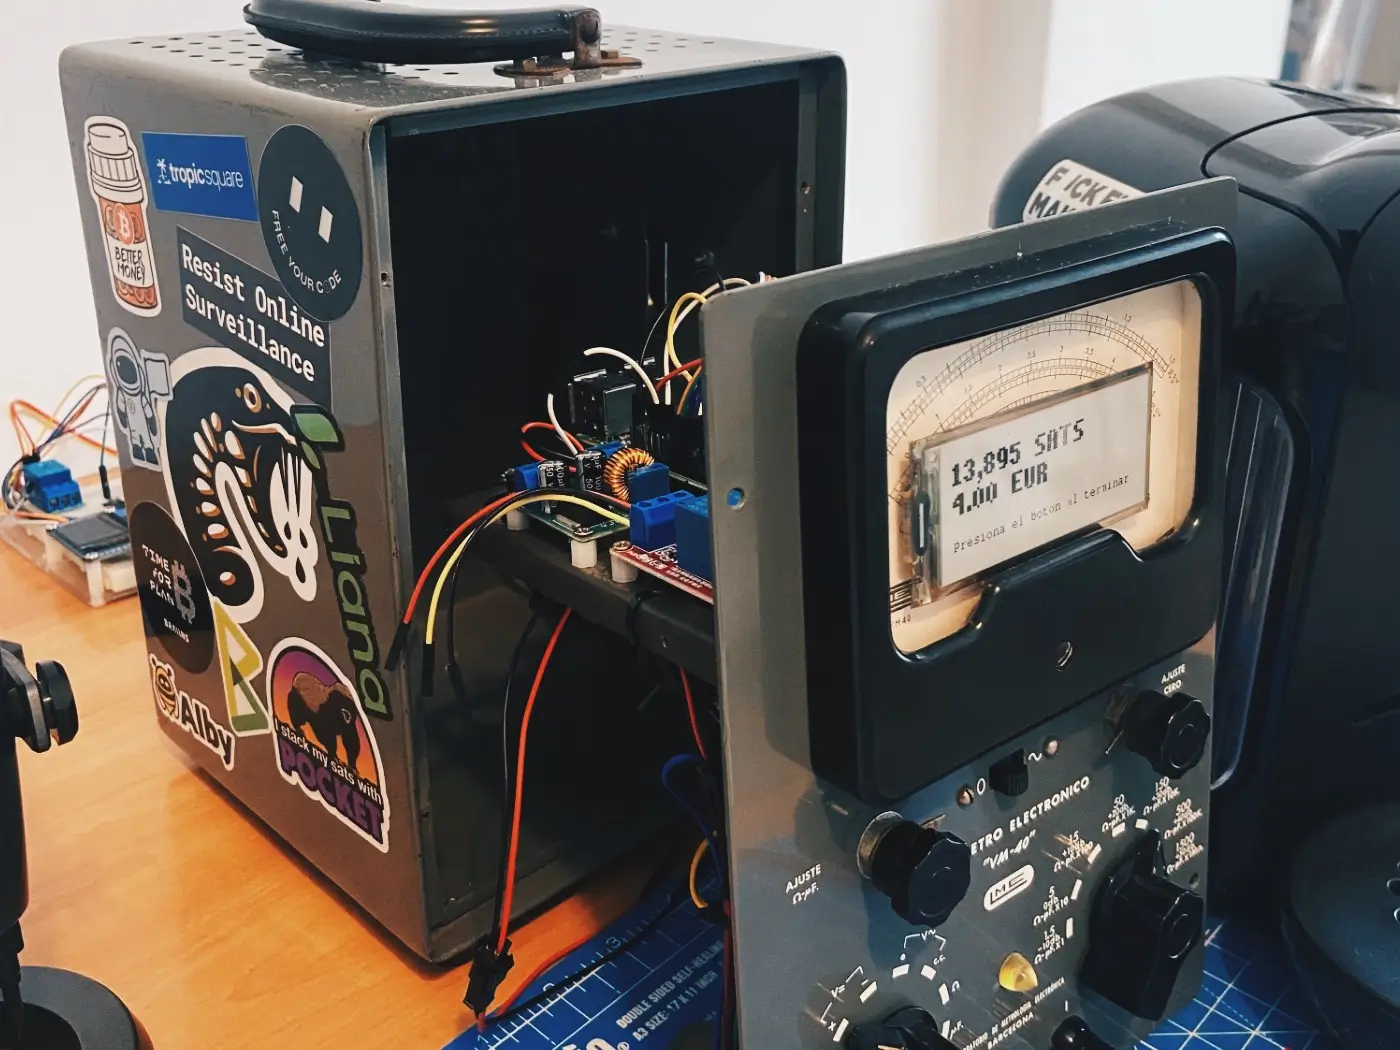
I enjoy reusing and recycling old objects, giving them a second life while respecting their history. I had an old electronic voltmeter from the 1950s–60s, brand LME, made in Barcelona. It no longer worked, but its aesthetics were amazing: metal body, analog scale, industrial typography, and a presence that invited interaction.
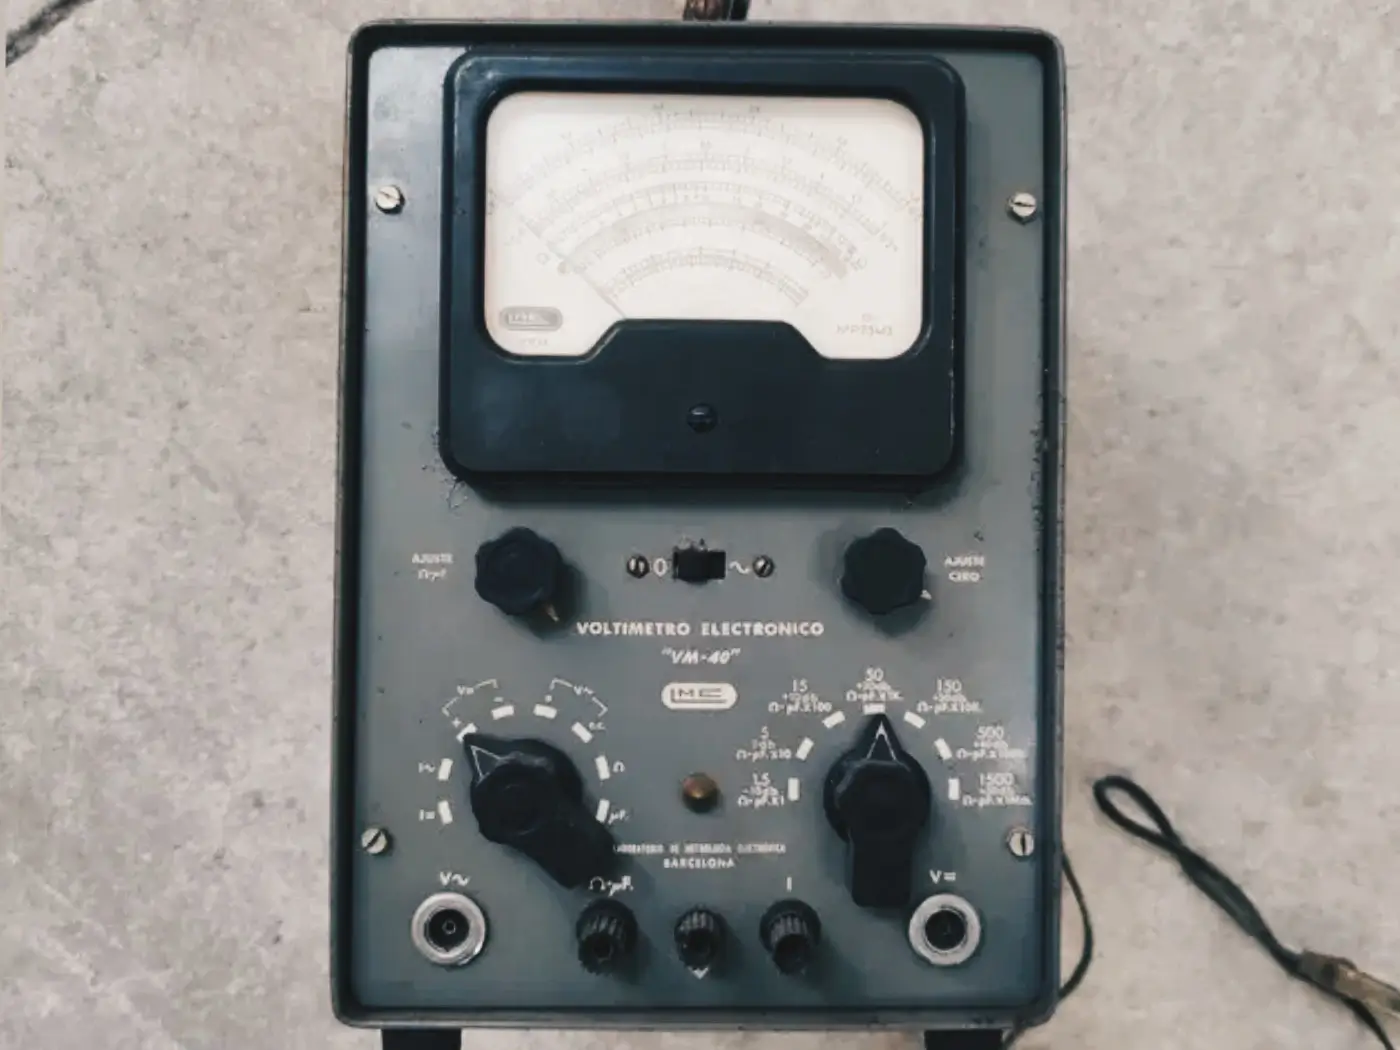
Turning an instrument designed to measure volts into a Bitcoin ATM felt too good to pass up. It connected two worlds separated by more than half a century: classic analog electronics and decentralized digital money.
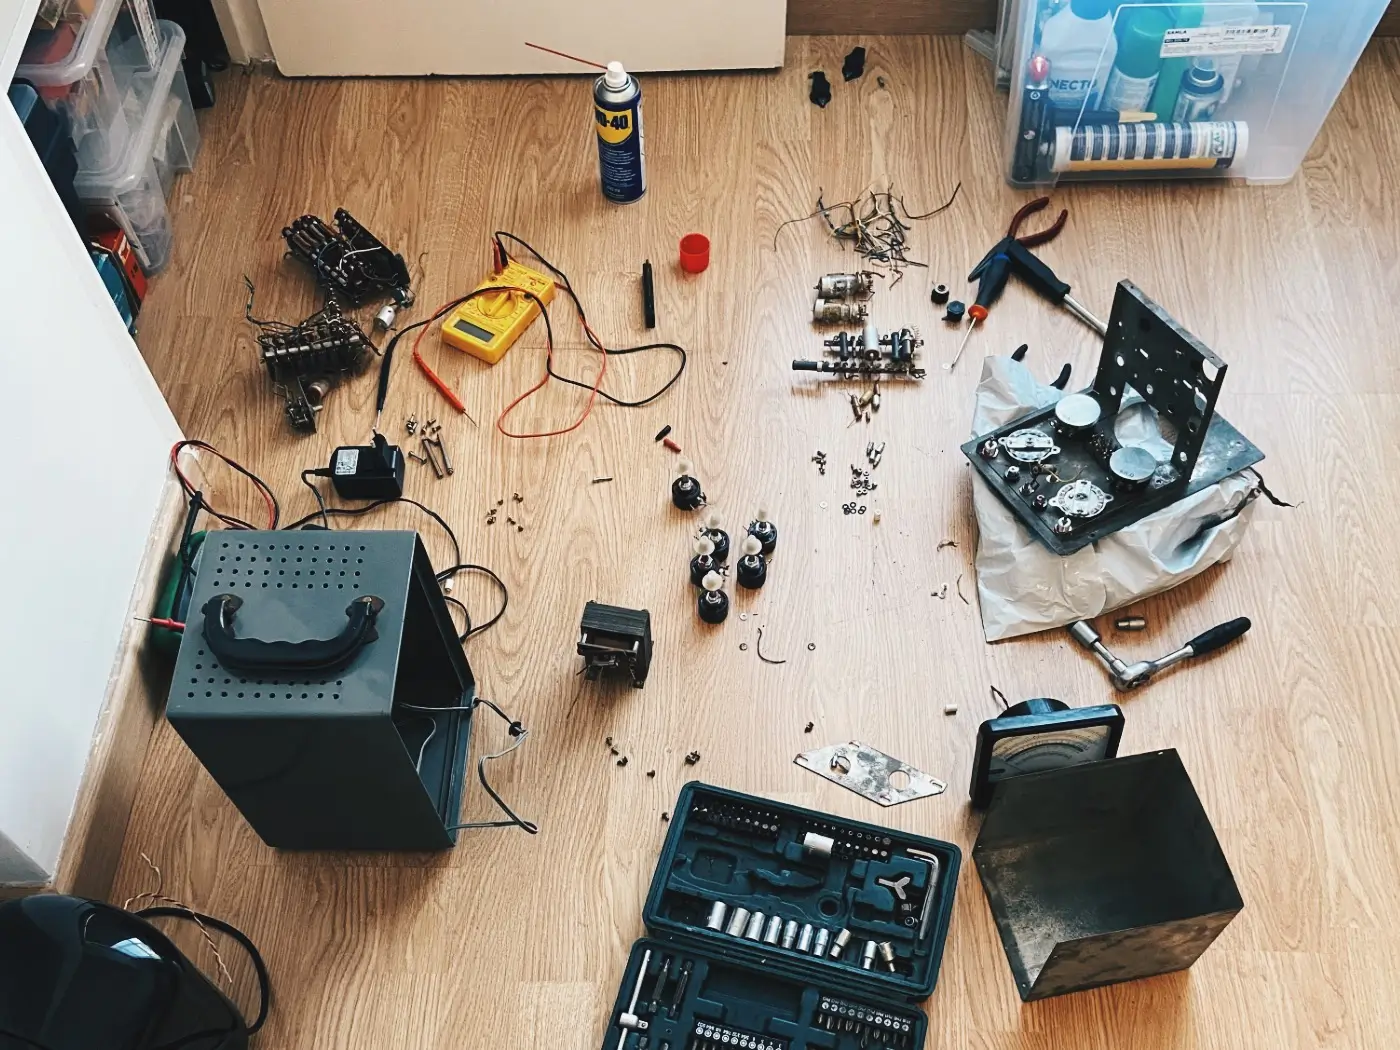
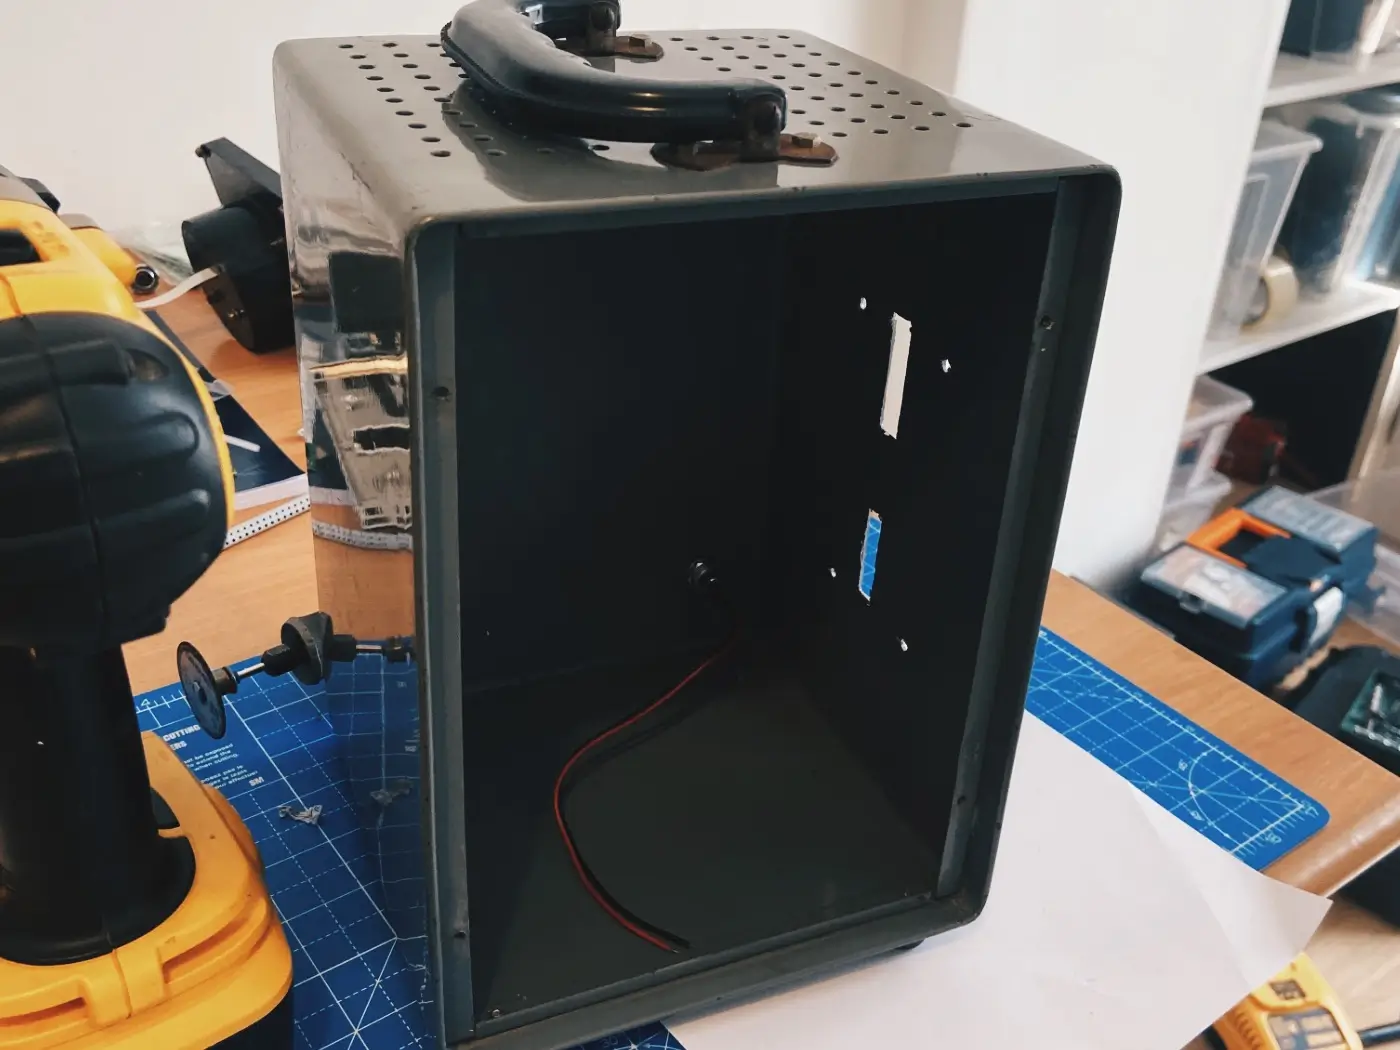
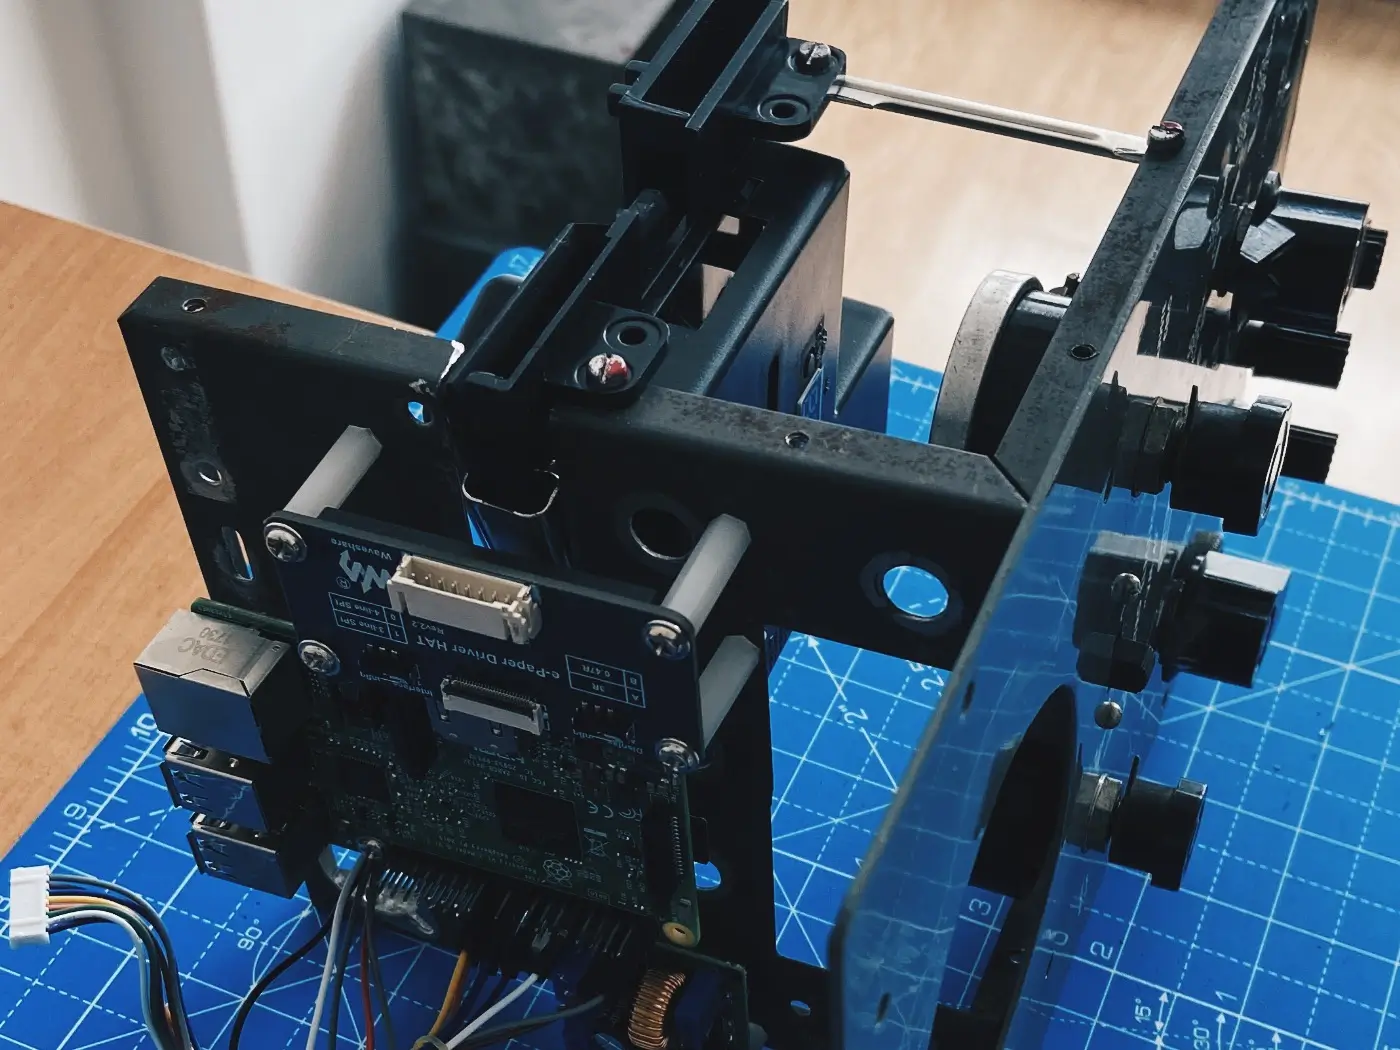
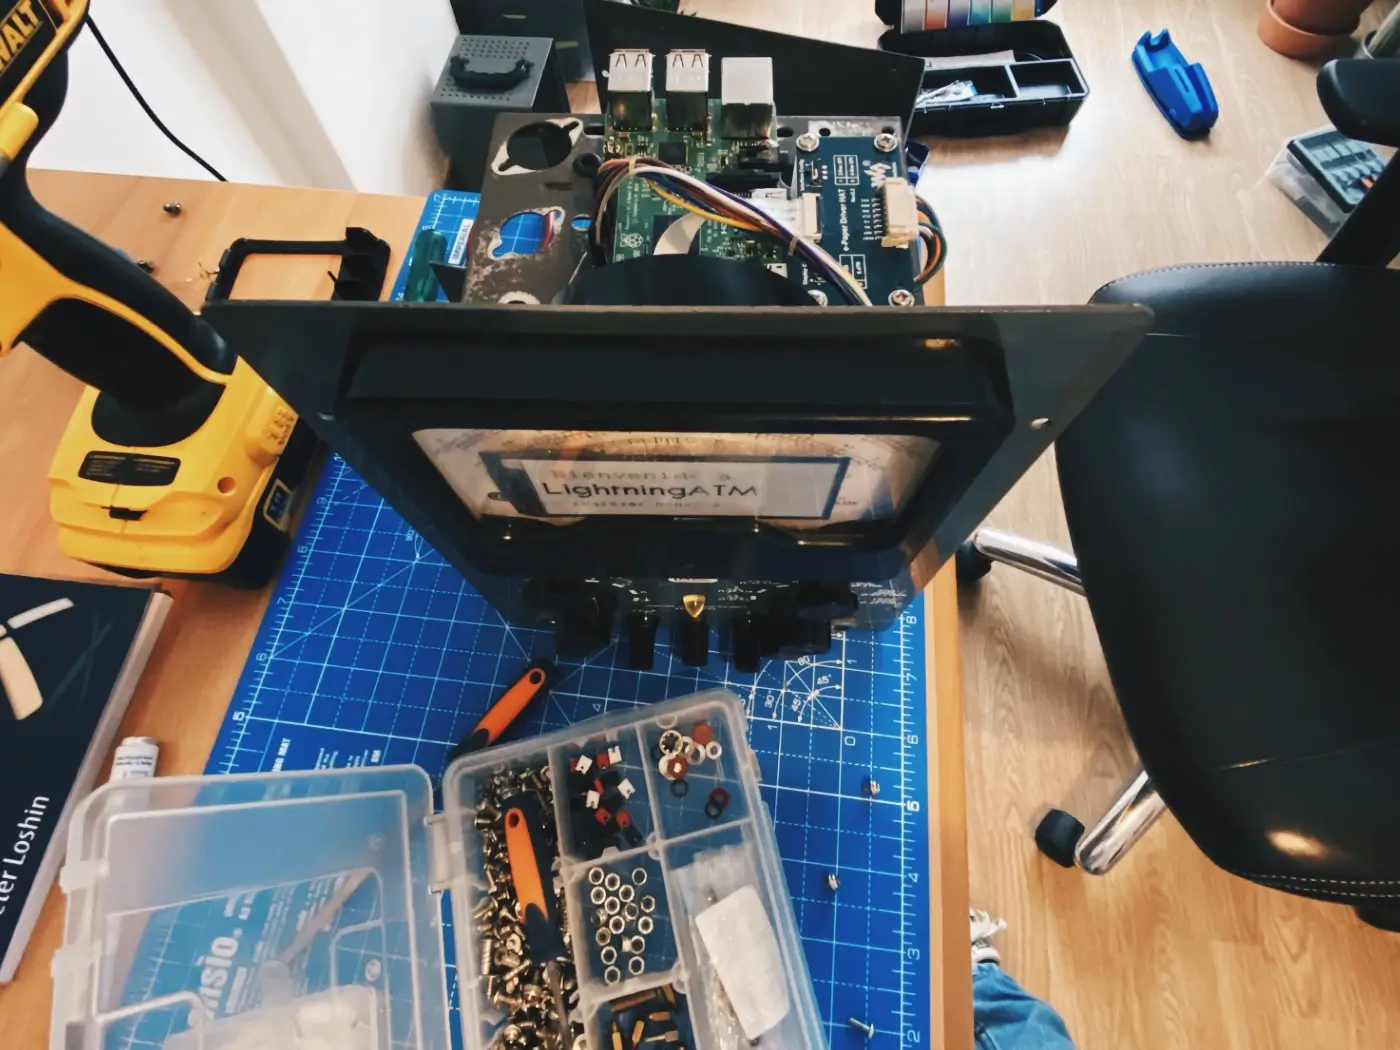
Adapting the voltmeter wasn’t trivial. The interior had to be completely emptied, the original enclosure preserved, and a way found to integrate the display, coin acceptor, and buttons without breaking the device’s aesthetic. The priority wasn’t ease of assembly, but maintaining the object’s original character.
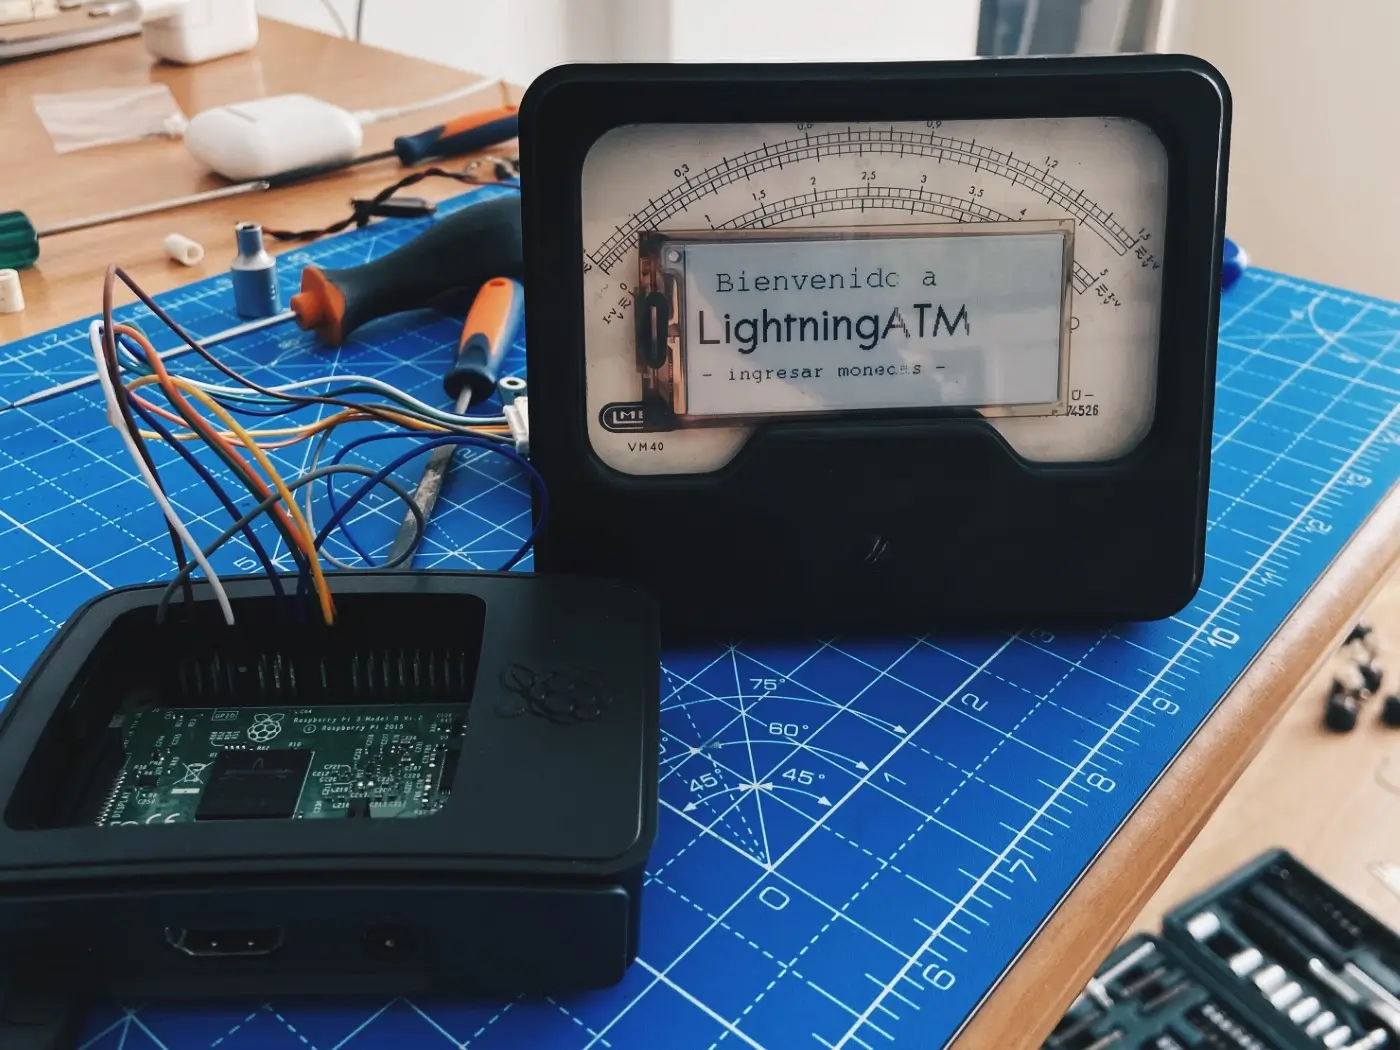
The final result doesn’t aim to look like a modern commercial product. On the contrary, it feels like a machine from another era, and that actually benefits the project. People approach it out of curiosity, ask what it is, and only then discover they’re interacting with Bitcoin and the Lightning Network.
Reusing this kind of old hardware not only reduces waste, it also adds a narrative layer to the project. The ATM stops being just a technical device and becomes a piece that tells a story even before it’s used.
The final prototype
Once all the hardware was integrated into the voltmeter, the ATM started to take shape as a complete object. At this stage, the focus shifted from internal functionality to presentation, interaction, and visual coherence.
Early versions of the prototype used a Raspberry Pi 3B, simply because it was available and convenient for development and testing. Once the project was validated, the system was migrated to a Raspberry Pi Zero W, which is more compact and better suited for a final device of this kind. Functionally nothing changed, but size and internal simplicity improved significantly.
For this reason, some process photos still show the Raspberry Pi 3B, as they belong to the early build iterations.
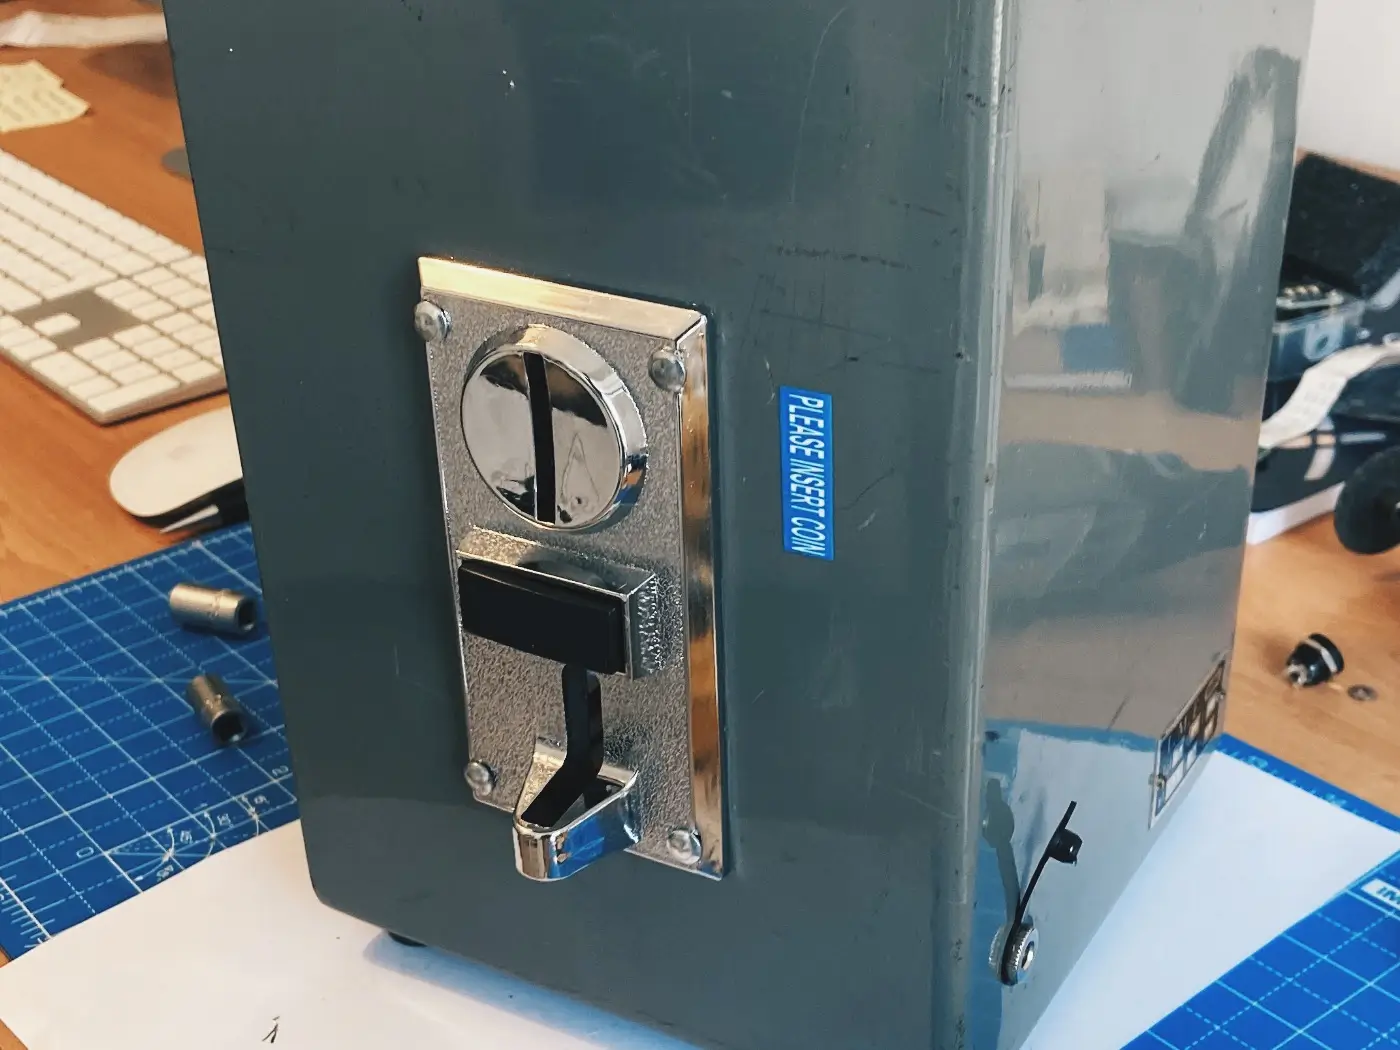
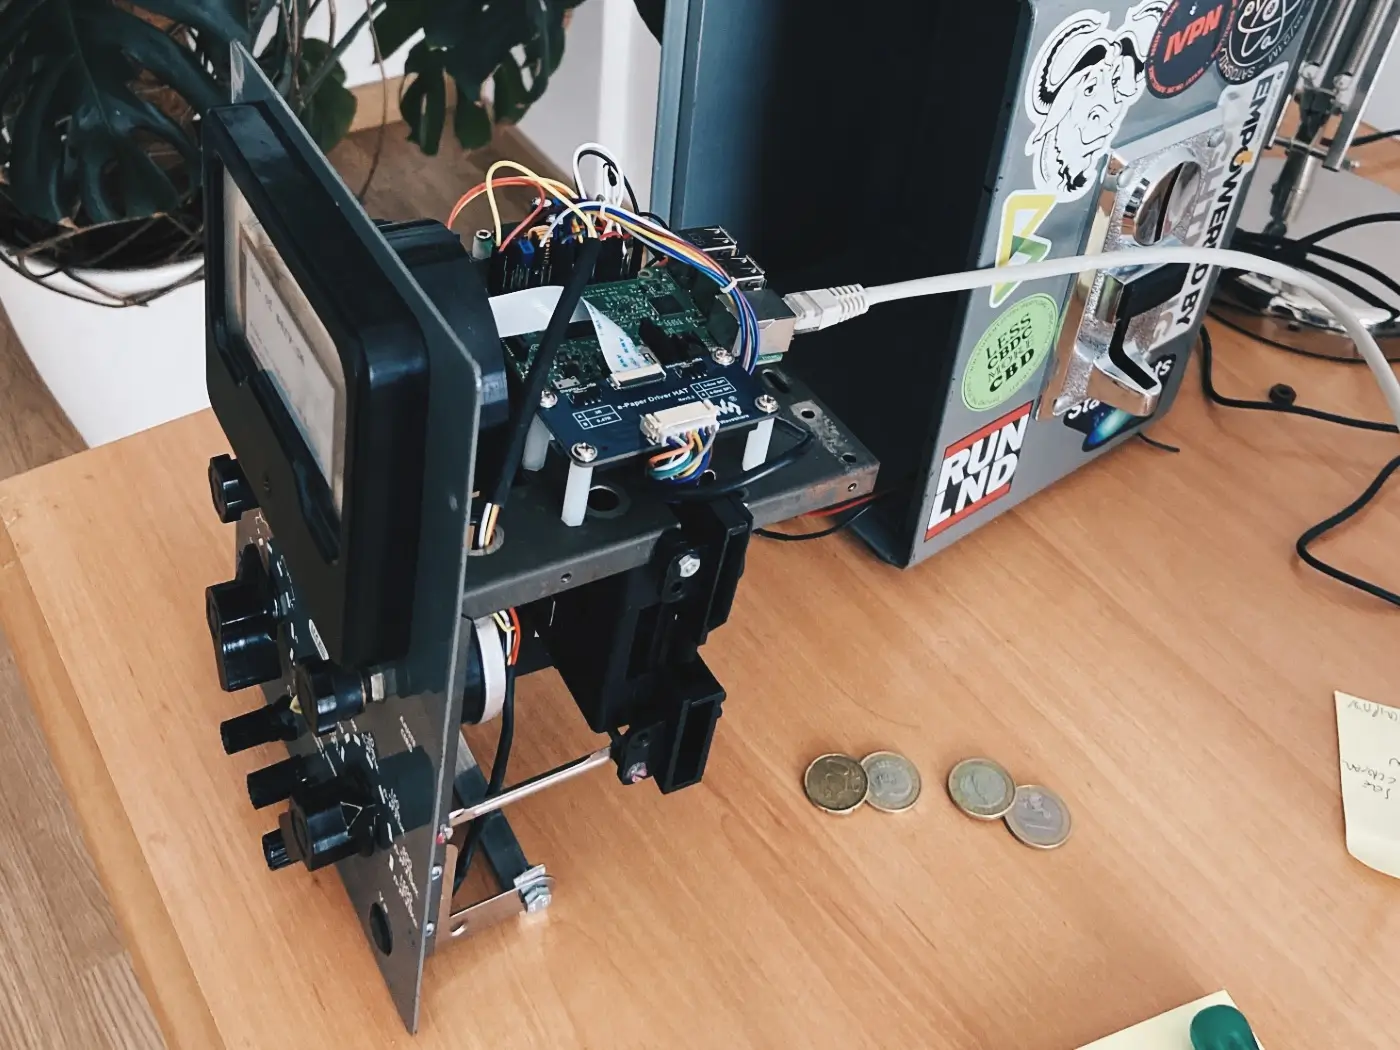
The layout of the elements was designed with user experience in mind. The screen sits in a clearly visible position, the buttons are placed intuitively, and the coin acceptor is integrated while respecting the voltmeter’s original aesthetic. There are no visible instructions or complex prompts; interaction feels natural.
The result is an ATM that doesn’t look like a modern tech device. At first glance it could pass for an old industrial instrument, and that ambiguity is exactly what sparks curiosity. People approach it, ask what it is, and only then realize they’re interacting with Bitcoin.

The final prototype fulfills its main goal: to serve as a functional, stable, and easy-to-use educational tool, without pretending to be a commercial product or a closed design.
Connection with LNbits
To manage the satoshis distributed by the ATM, the project relies on LNbits as a backend. LNbits acts as the funding source and makes it easy to control how much Bitcoin the ATM can dispense.
The ATM uses LNURL-withdraw, which generates a QR code that allows users to withdraw satoshis directly into their Lightning wallet. This fits perfectly with the educational goal of the project, as it removes intermediate steps and makes the process immediate.
From LNbits, limits can be set, balance can be topped up, and ATM usage can be monitored without complexity. There’s no need to expose nodes or configure advanced settings on the device itself, which greatly simplifies maintenance and reduces the risk of issues during demonstrations.
Conclusions and possible improvements
This project achieves its original goal: bringing Bitcoin into the physical world and making it easier to understand through direct experience. Turning a coin into satoshis, in seconds and right in front of the user, is far more effective than any theoretical explanation.
Using recycled hardware and an enclosure with history adds a narrative layer that amplifies the ATM’s impact. It’s not just a functional machine, but an object that invites questions and interaction.
Looking ahead, there’s room to explore improvements such as a more informative interface, demo modes without real value, or greater modularity in the design. Even in its current state, however, the ATM fulfills its role as a simple, effective, and replicable educational tool.
In short, this DIY Bitcoin ATM doesn’t aim to be perfect or final. It aims to be useful. And above all, it aims to make Bitcoin stop feeling abstract and become something you can see, touch, and understand.


Great idea. I had a similar idea about 5yrs. ago, as I saw a completely built “production” unit, shipping out of another country. It was a table top unit similar to yours. My idea was to mount it into a Sprinter van and take it to my meetings and other events to help people become comfortable using their wallets.
Didn’t happen as they wanted too much money and wouldn’t guarantee it would make it through customs among other things.
Are you still active on this site?
Hey STCS, your idea is really good! If you like electronics and have a little knowledge, you can mount a unit like this with this two projects:
Or maybe buy one from the Bleskomat guys on https://www.bleskomat.com. They are really good people!
Let me know if you need anything else 💪