
Installing Sparrow Wallet on TailsOS persistently
Recently, I’ve had the chance to experiment with TailsOS and Sparrow Wallet. Essential pieces for any Bitcoiner.
TailsOS? What on earth is that magic?
TailsOS, short for “The Amnesic Incognito Live System,” is a Linux-based operating system designed to preserve users’ privacy and anonymity. It runs from a USB drive or DVD and aims to provide a secure and anonymous environment for online activities.
TailsOS includes encryption and anonymity tools like Tor, which routes traffic through a network of servers to hide the user’s identity and location. Furthermore, TailsOS is designed not to leave any trace on the device it’s used on, as it doesn’t save information permanently, thus offering an additional layer of protection for those seeking to browse the internet discreetly and safely.
And what is Sparrow Wallet?
Sparrow Wallet is a Bitcoin wallet designed for those who value financial sovereignty. With a focus on security, privacy, and ease of use, Sparrow doesn’t conceal information but provides comprehensive details about transactions and UTXOs in a manageable way.

Value 4 value⚡️
If the content has been useful to you, please consider supporting me so that I can create more articles like this. Lightning address (only for Lightning payments): [email protected]
The wallet supports standard features of modern Bitcoin wallets, such as full support for single and multisig wallets, multiple connection options, compatibility with hardware wallets, full control over coins and fees, and transaction labeling.
Moreover, Sparrow is unique in offering a fully-featured transaction editor that also functions as a blockchain explorer, allowing for the editing and inspection of transaction bytes before transmission. Sparrow encourages privacy and promotes cold storage practices, being user-friendly even for advanced users.
Add Sparrow to persistent storage
So far, all the guides I’ve found that use Sparrow on TailsOS do so by installing and configuring Sparrow each time the system starts. It’s a secure strategy, but it requires time investment every time you boot up the system.
⚠️ Keep in mind that this guide is not a recommendation on how to use Sparrow with TailsOS; it simply proposes one way to do things. You’ll need to evaluate whether in your personal case you want to store the data or not.
🚨 Do not use this method if you’re going to store any seeds in Sparrow. This would be ideal if you want to store a “Watch Only Wallet” and label the UTXOs (for example).
Enable persistent storage in TailsOS
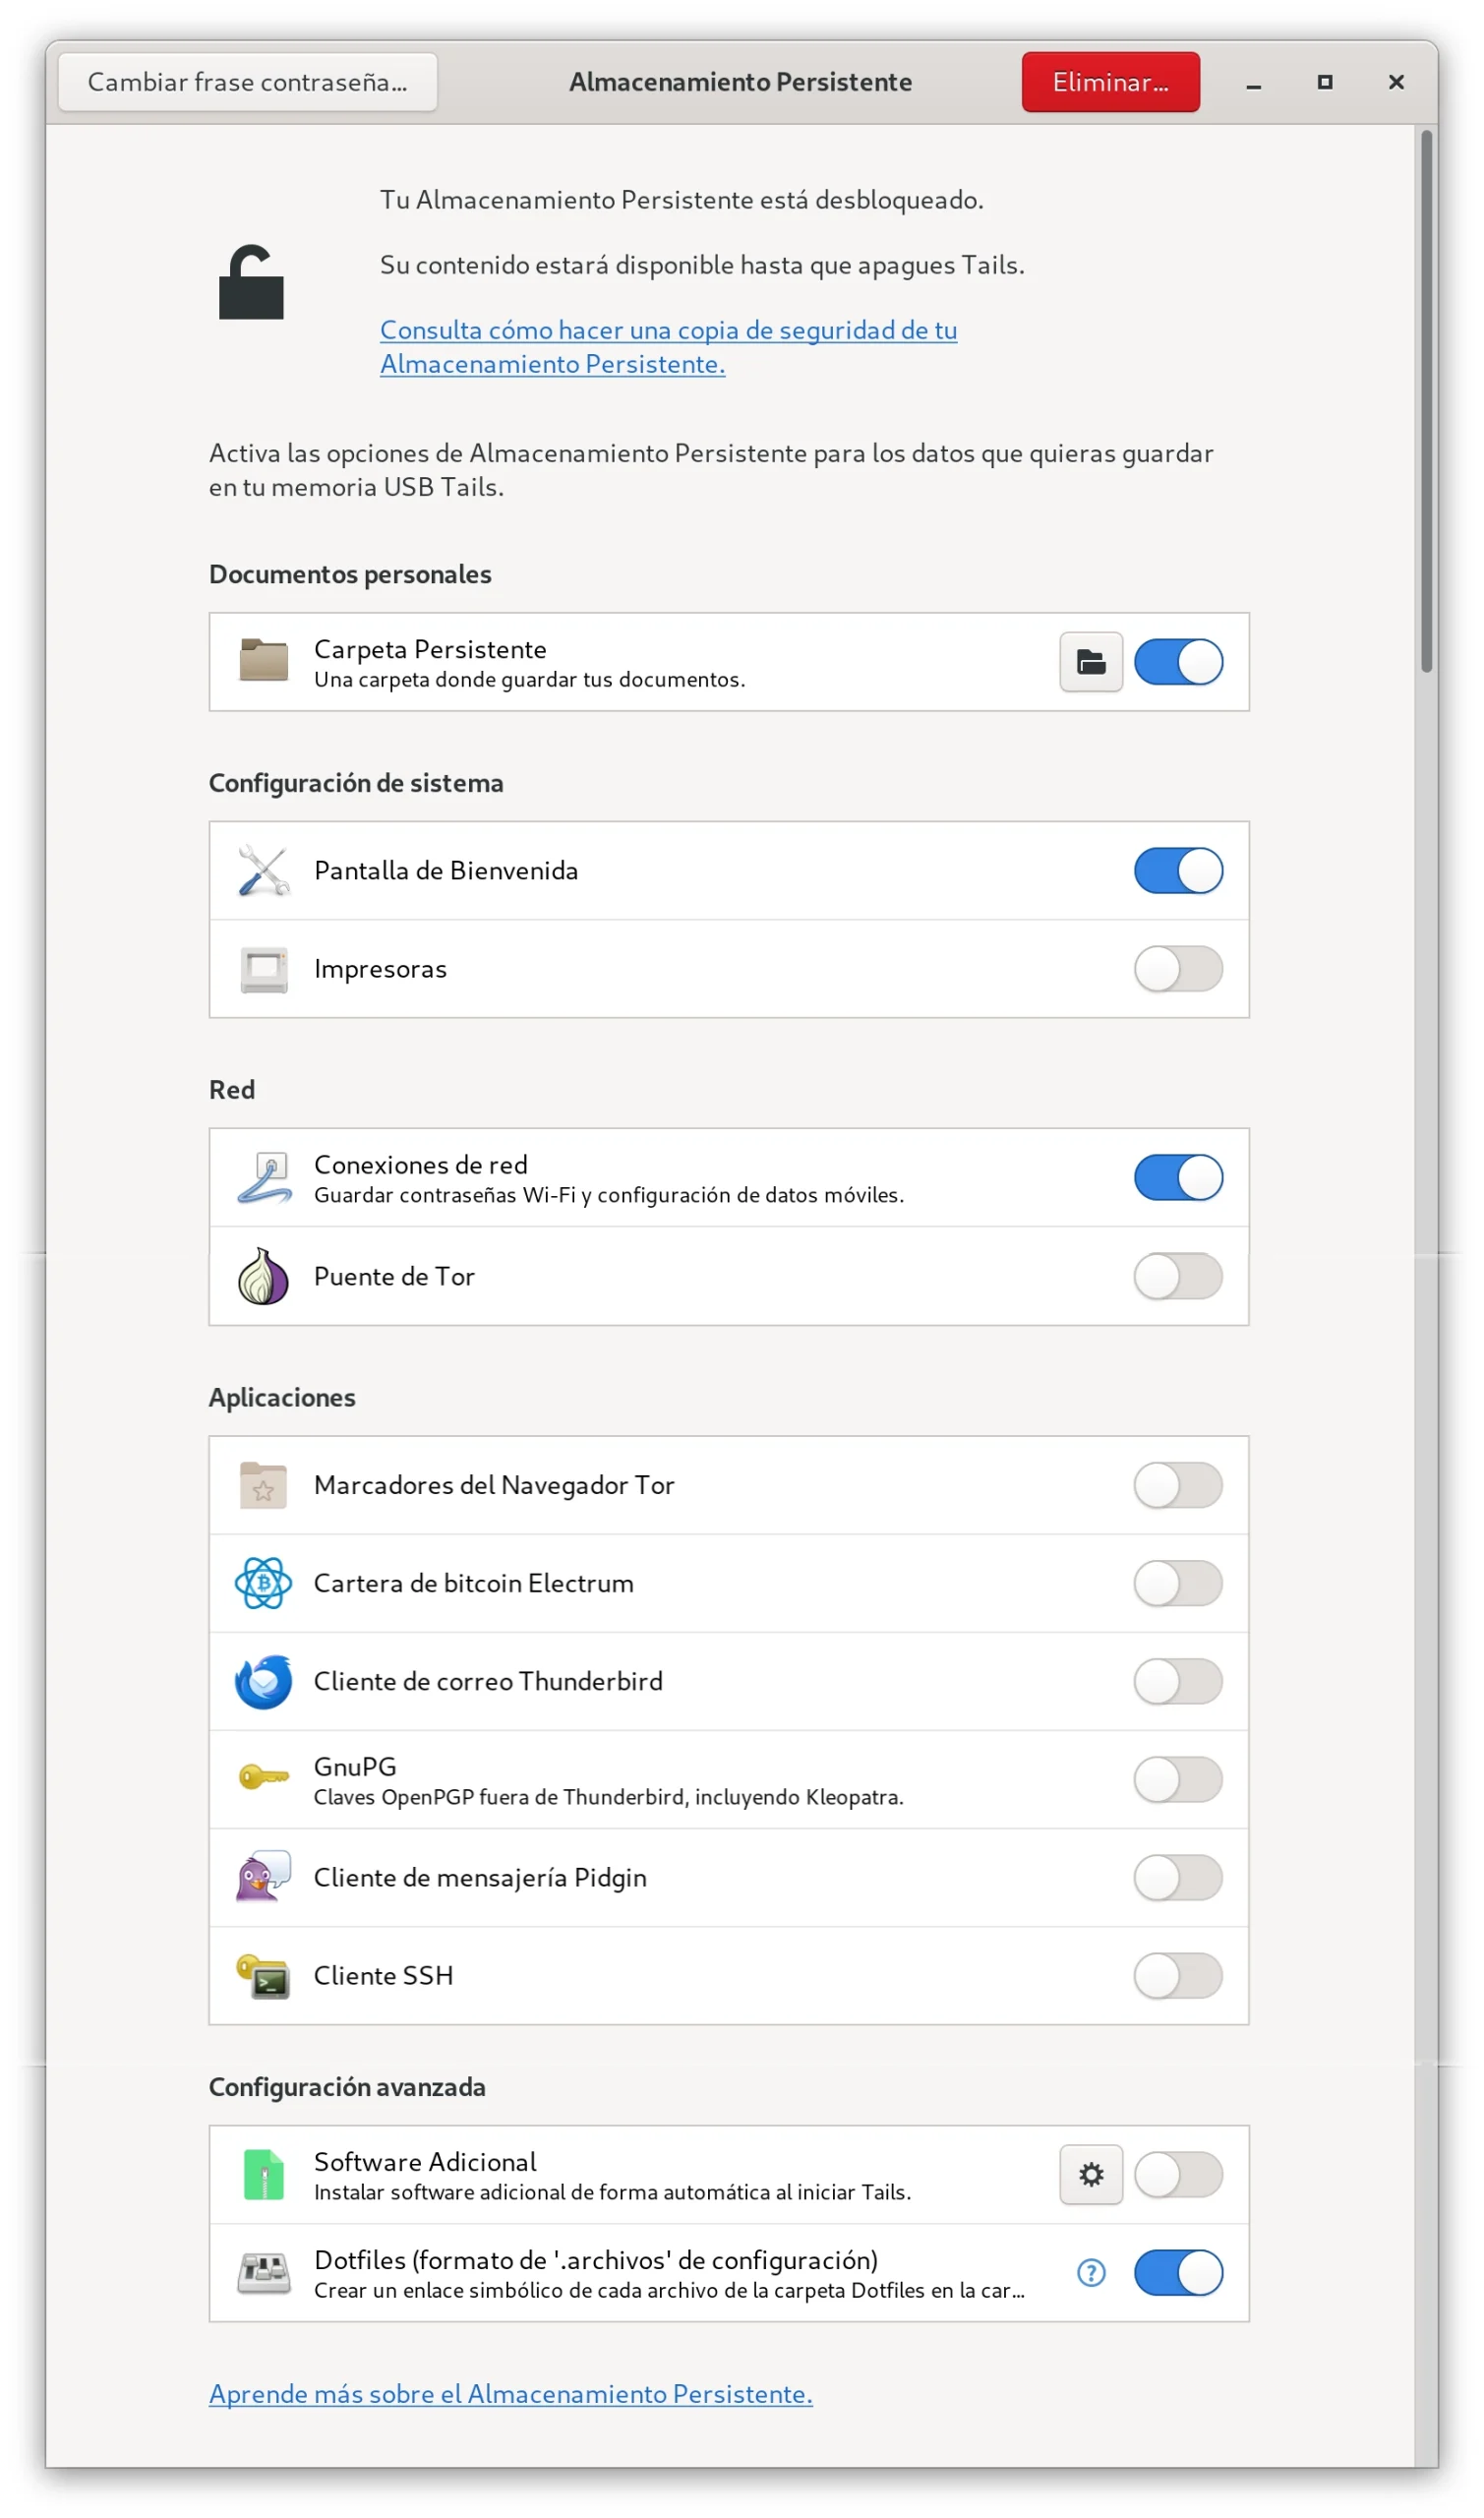
Once you activate persistent storage in TailsOS from Applications → Tails → Persistent Storage, you should activate among others:
- Personal Documents → Persistent Folder
- System Settings → Welcome Screen (optional for convenience)
- Network → Network Connections (optional for convenience)
- Advanced Settings → Dotfiles
Download Sparrow Wallet on TailsOS
We are going to download the Sparrow Wallet (desktop version) binary from https://sparrowwallet.com/download/. Since I am using a device with Intel, I will go for the Linux (Intel/AMD) Standalone version (it is important that you download the Standalone version).
At the time of writing this article, the version is sparrow-1.8.2-x86_64.tar.gz.
⚠️ Don’t forget to verify the integrity of the downloaded files following the guide at the bottom of the download page.
Organizing persistent storage in TailsOS
Once the integrity of the downloaded data has been verified, let’s create some folders in the persistent storage:
- ~/Persistent/Programas
- ~/Persistent/Programas/Sparrow
- ~/Persistent/Programas/Sparrow/data
You can create all the folders with the following command:
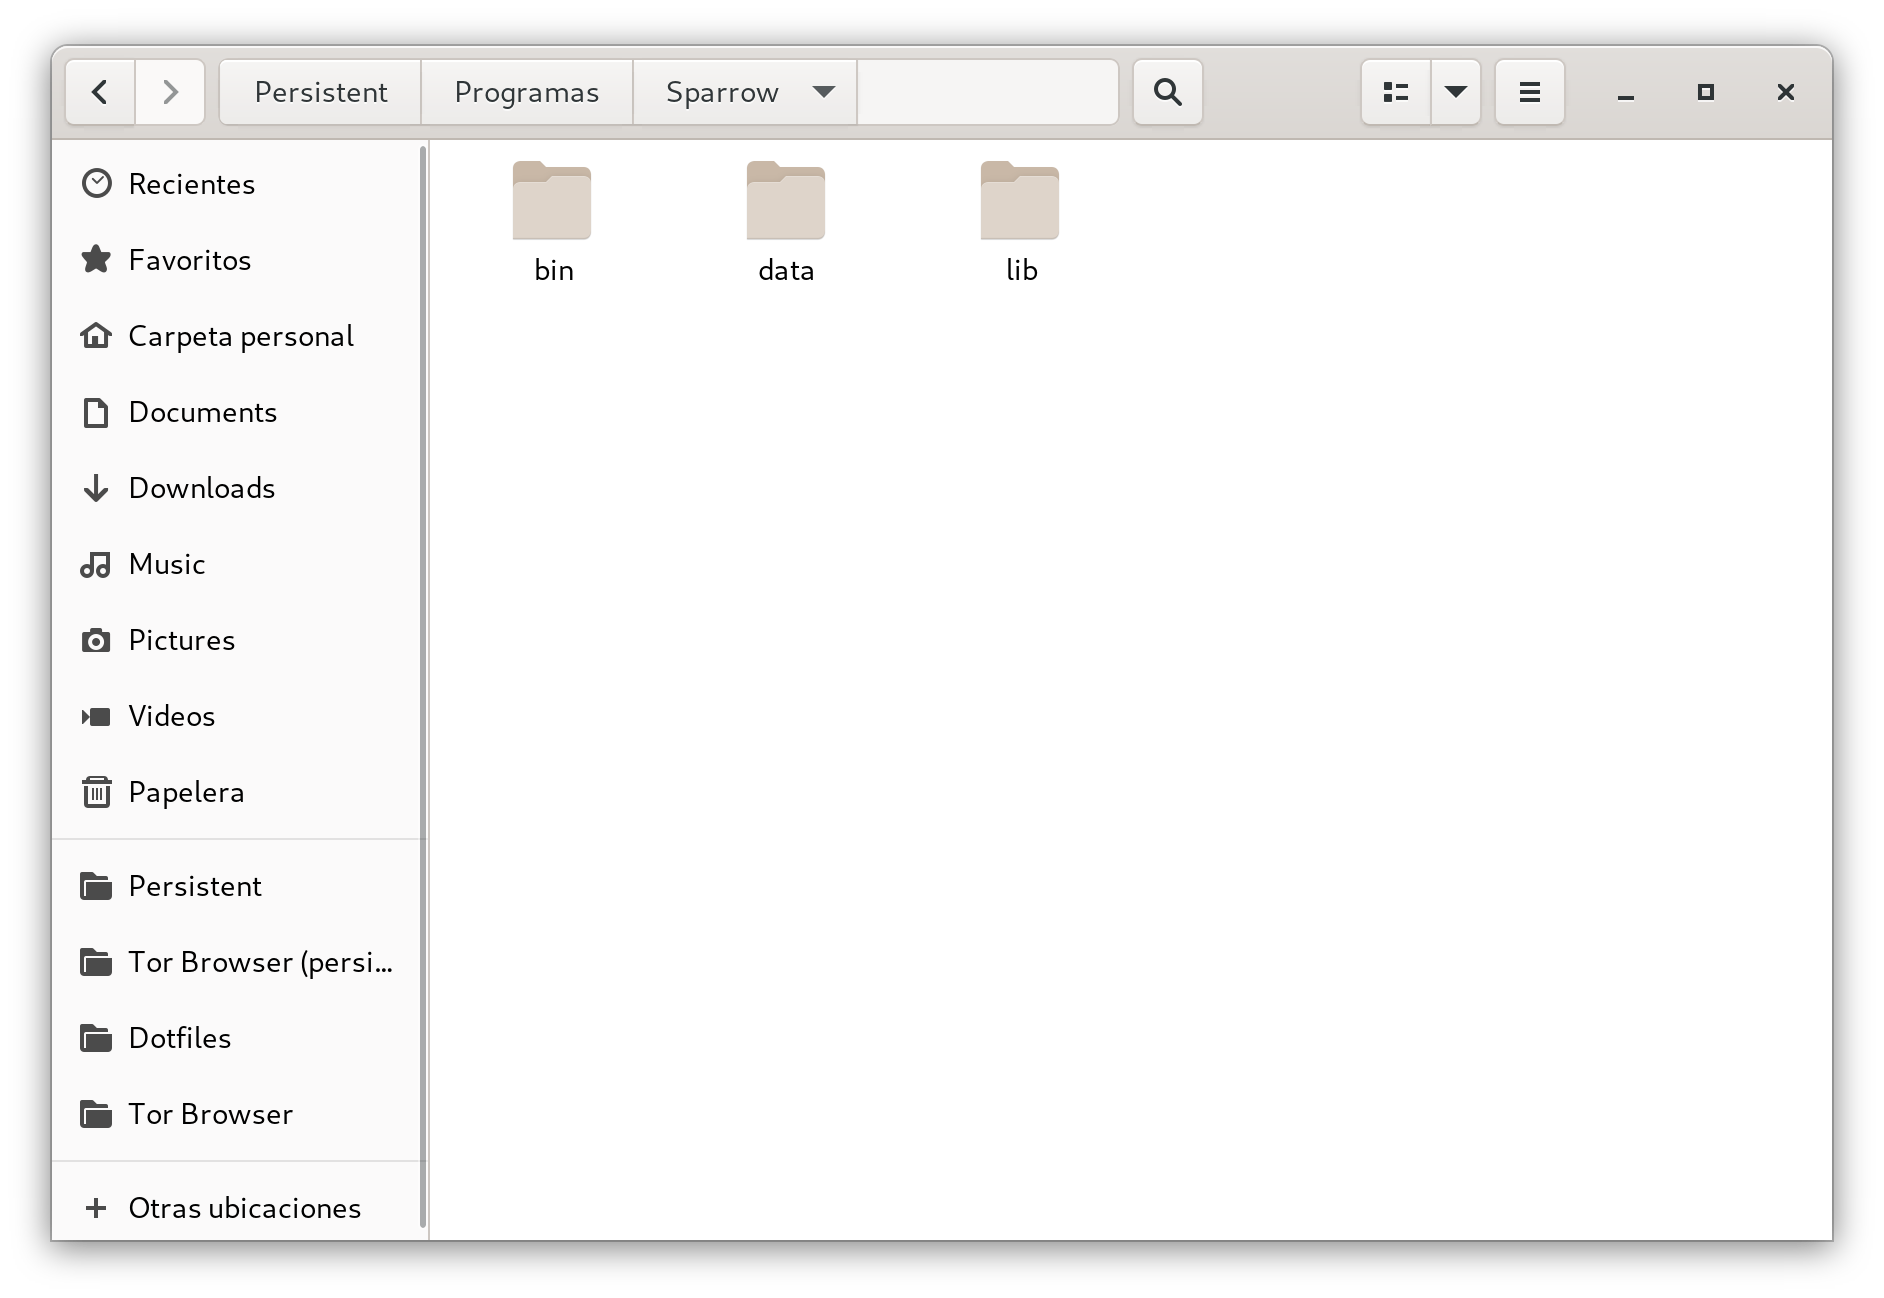
mkdir -p ~/Persistent/Programas/Sparrow/dataThe next step will be to extract the contents of the downloaded file sparrow-1.8.2-x86_64.tar.gz into the folder Programas/Sparrow.
Now you will have 3 folders inside Programas/Sparrow: bin, data, and lib.
Let’s do a quick test to see if we can run Sparrow from the terminal:
~/Persistent/Programas/Sparrow/bin/Sparrow -d ~/Persistent/Programas/Sparrow/dataWhat we’re indicating with the parameter -d when running Sparrow is to assign our data directory. You can see the parameters here: https://sparrowwallet.com/docs/faq.html#how-can-i-run-testnet
If the test goes well, we know that the paths are correct and that our persistent storage has been organized as we wanted.
👊 Close Sparrow.
Add Sparrow Wallet to our applications in TailsOS
The next step is to add Sparrow Wallet to the list of applications in TailsOS. To do this, we need to create some more folders, this time within the dotfiles folder:
- /live/persistence/TailsData_unlocked/dotfiles/.local
- /live/persistence/TailsData_unlocked/dotfiles/.local/share
- /live/persistence/TailsData_unlocked/dotfiles/.local/share/applications
Keep in mind that if you go to the /live/persistence/TailsData_unlocked/dotfiles/ folder and create a .local folder, you won’t see it from the file explorer since it’s a hidden file. If you want to view the folder, you’ll need to enable the option to View Hidden Files in the folder.
You can create all the folders with the following command.
mkdir -p /live/persistence/TailsData_unlocked/dotfiles/.local/share/applicationsNow we are going to create a new file Sparrow.desktop and edit it with nano:
nano /live/persistence/TailsData_unlocked/dotfiles/.local/share/applications/Sparrow.desktopThe content we are going to put inside that file is the following:
[Desktop Entry]
Name=Sparrow
Comment=Sparrow
Exec=/home/amnesia/Persistent/Programas/Sparrow/bin/Sparrow -d /home/amnesia/Persistent/Programas/Sparrow/data %U
Icon=/home/amnesia/Persistent/Programas/Sparrow/lib/Sparrow.png
Terminal=false
Type=Application
Categories=Unknown
MimeType=application/psbt;application/bitcoin-transaction;x-scheme-handler/bitcoin;x-scheme-handler/auth47;x-scheme-handler/lightning
The source of this file is https://github.com/sparrowwallet/sparrow/blob/80fab6df995afde64a7334cb6faad341b99b6fbe/src/main/deploy/package/linux/Sparrow.desktop, the only details we have changed are the paths to the executable and the icon.
Launch Sparrow and test persistent storage
Here we have two options: one is to test the entire system we’ve set up right away like crazy 🤣, or the other is to restart the computer.
If you can’t wait and want to test before restarting, you just need to copy the file we’ve just created to your Home folder, with the following command:
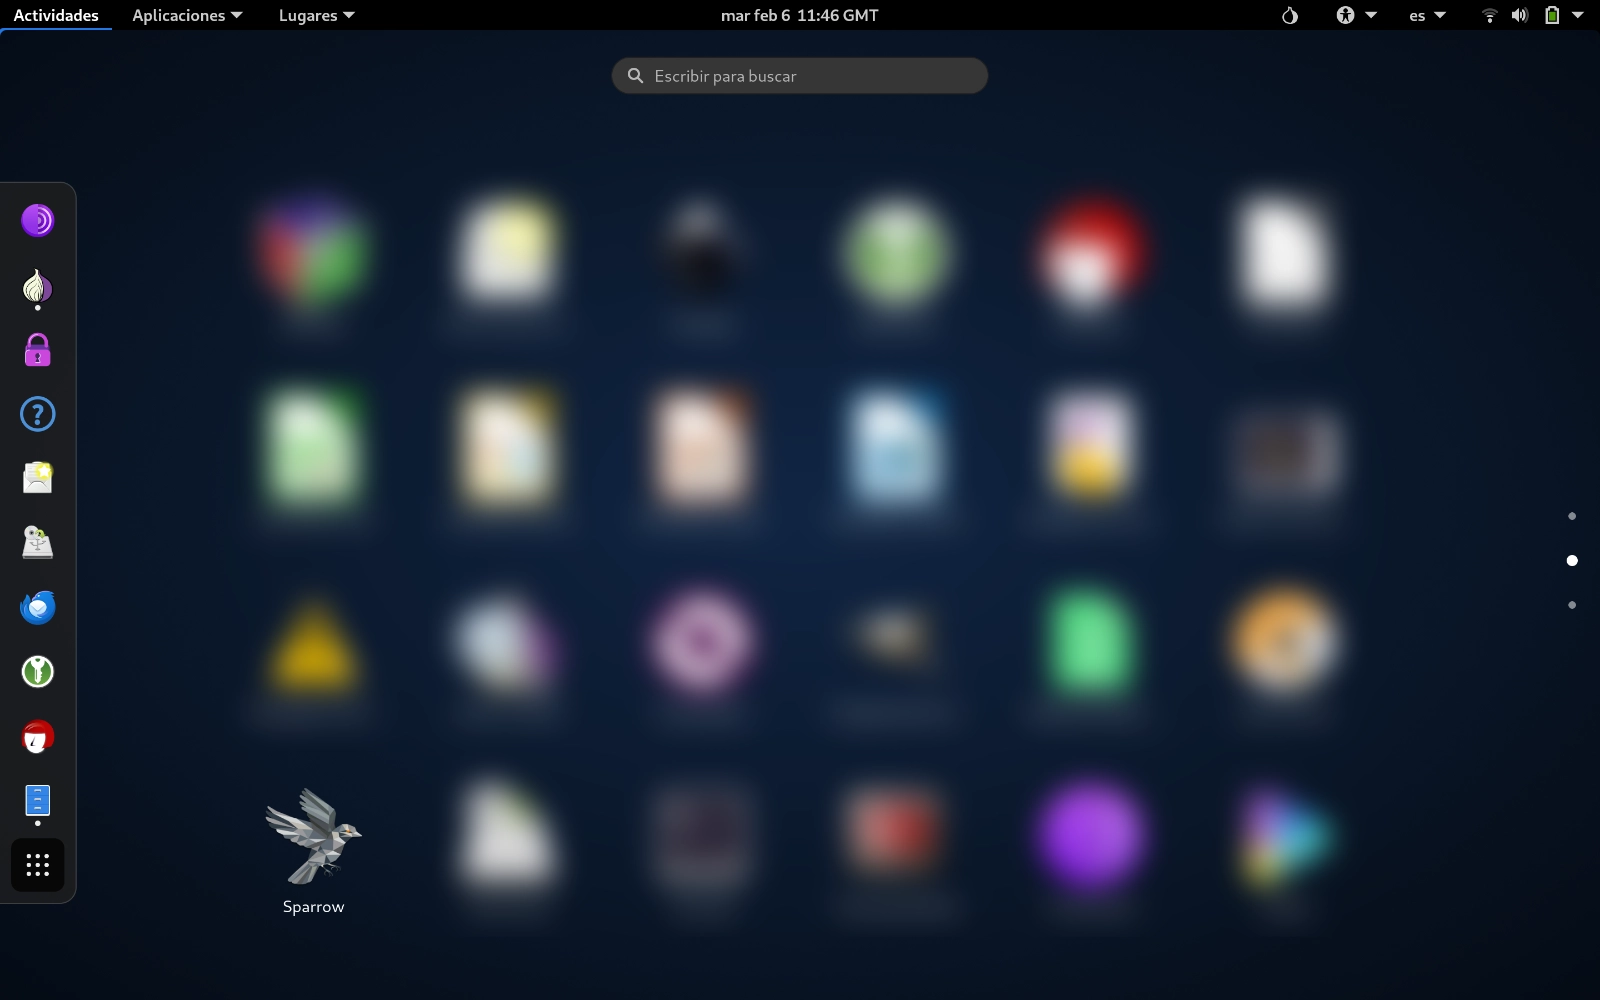
cp /live/persistence/TailsData_unlocked/dotfiles/.local/share/applications/Sparrow.desktop ~/.local/share/applications/Sparrow.desktopOnce you have copied the file, you will see Sparrow Wallet icon appear among the list of applications.
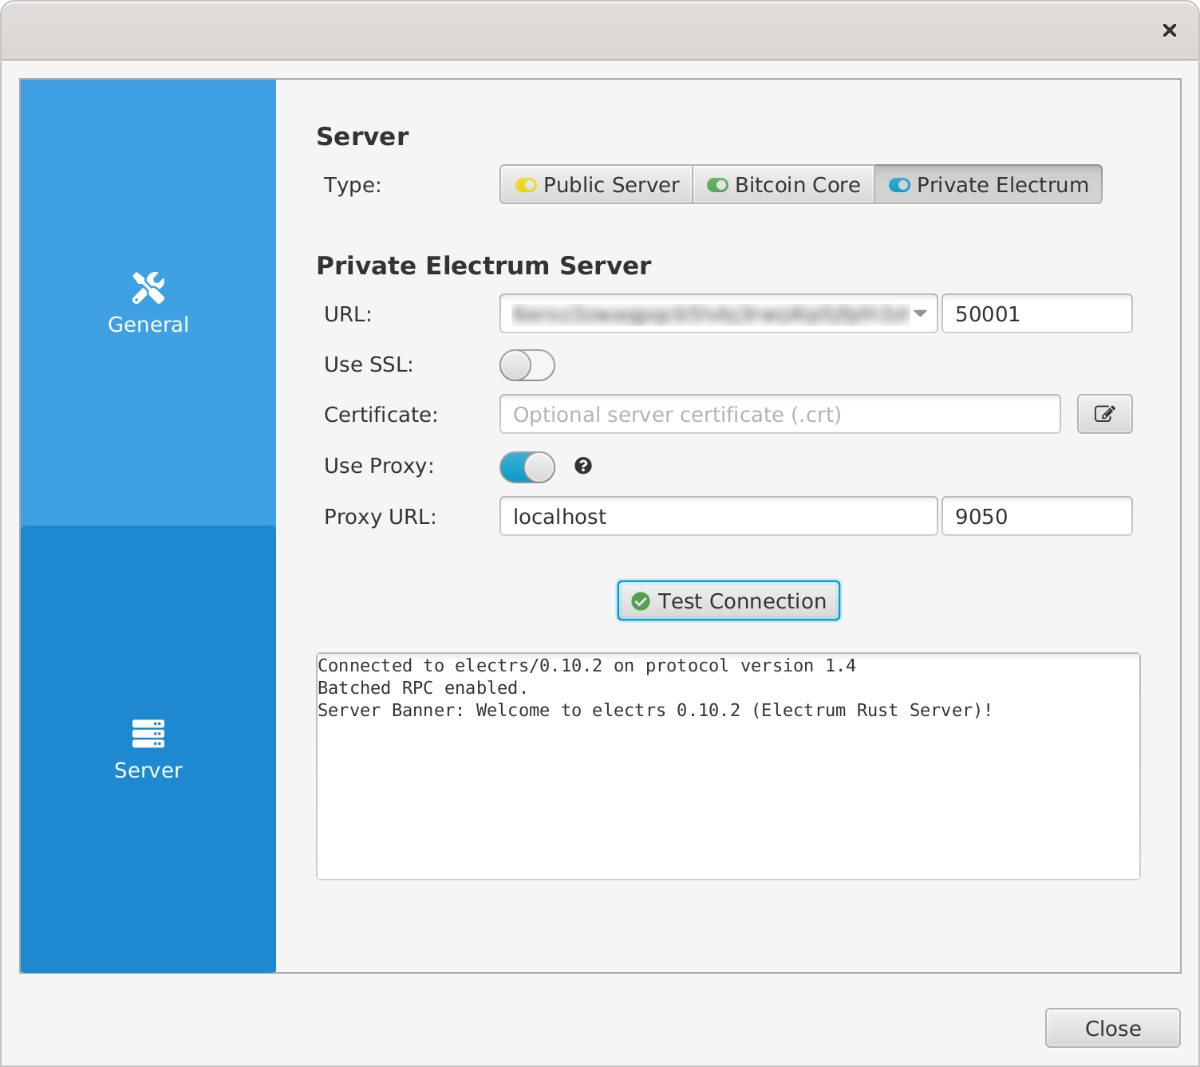
Open Sparrow and configure a server in the preferences.
ℹ️ To connect Sparrow through Tor in TailsOS, you must enable and use the proxy in the server preferences.
Use proxy: enabled
Proxy URL: localhost (or 127.0.0.1)
Port: 9050
⚠️ If you’re having trouble connecting to your node from Sparrow on Tails, visit this article: How to connect Sparrow Wallet to your Bitcoin node on Tails.
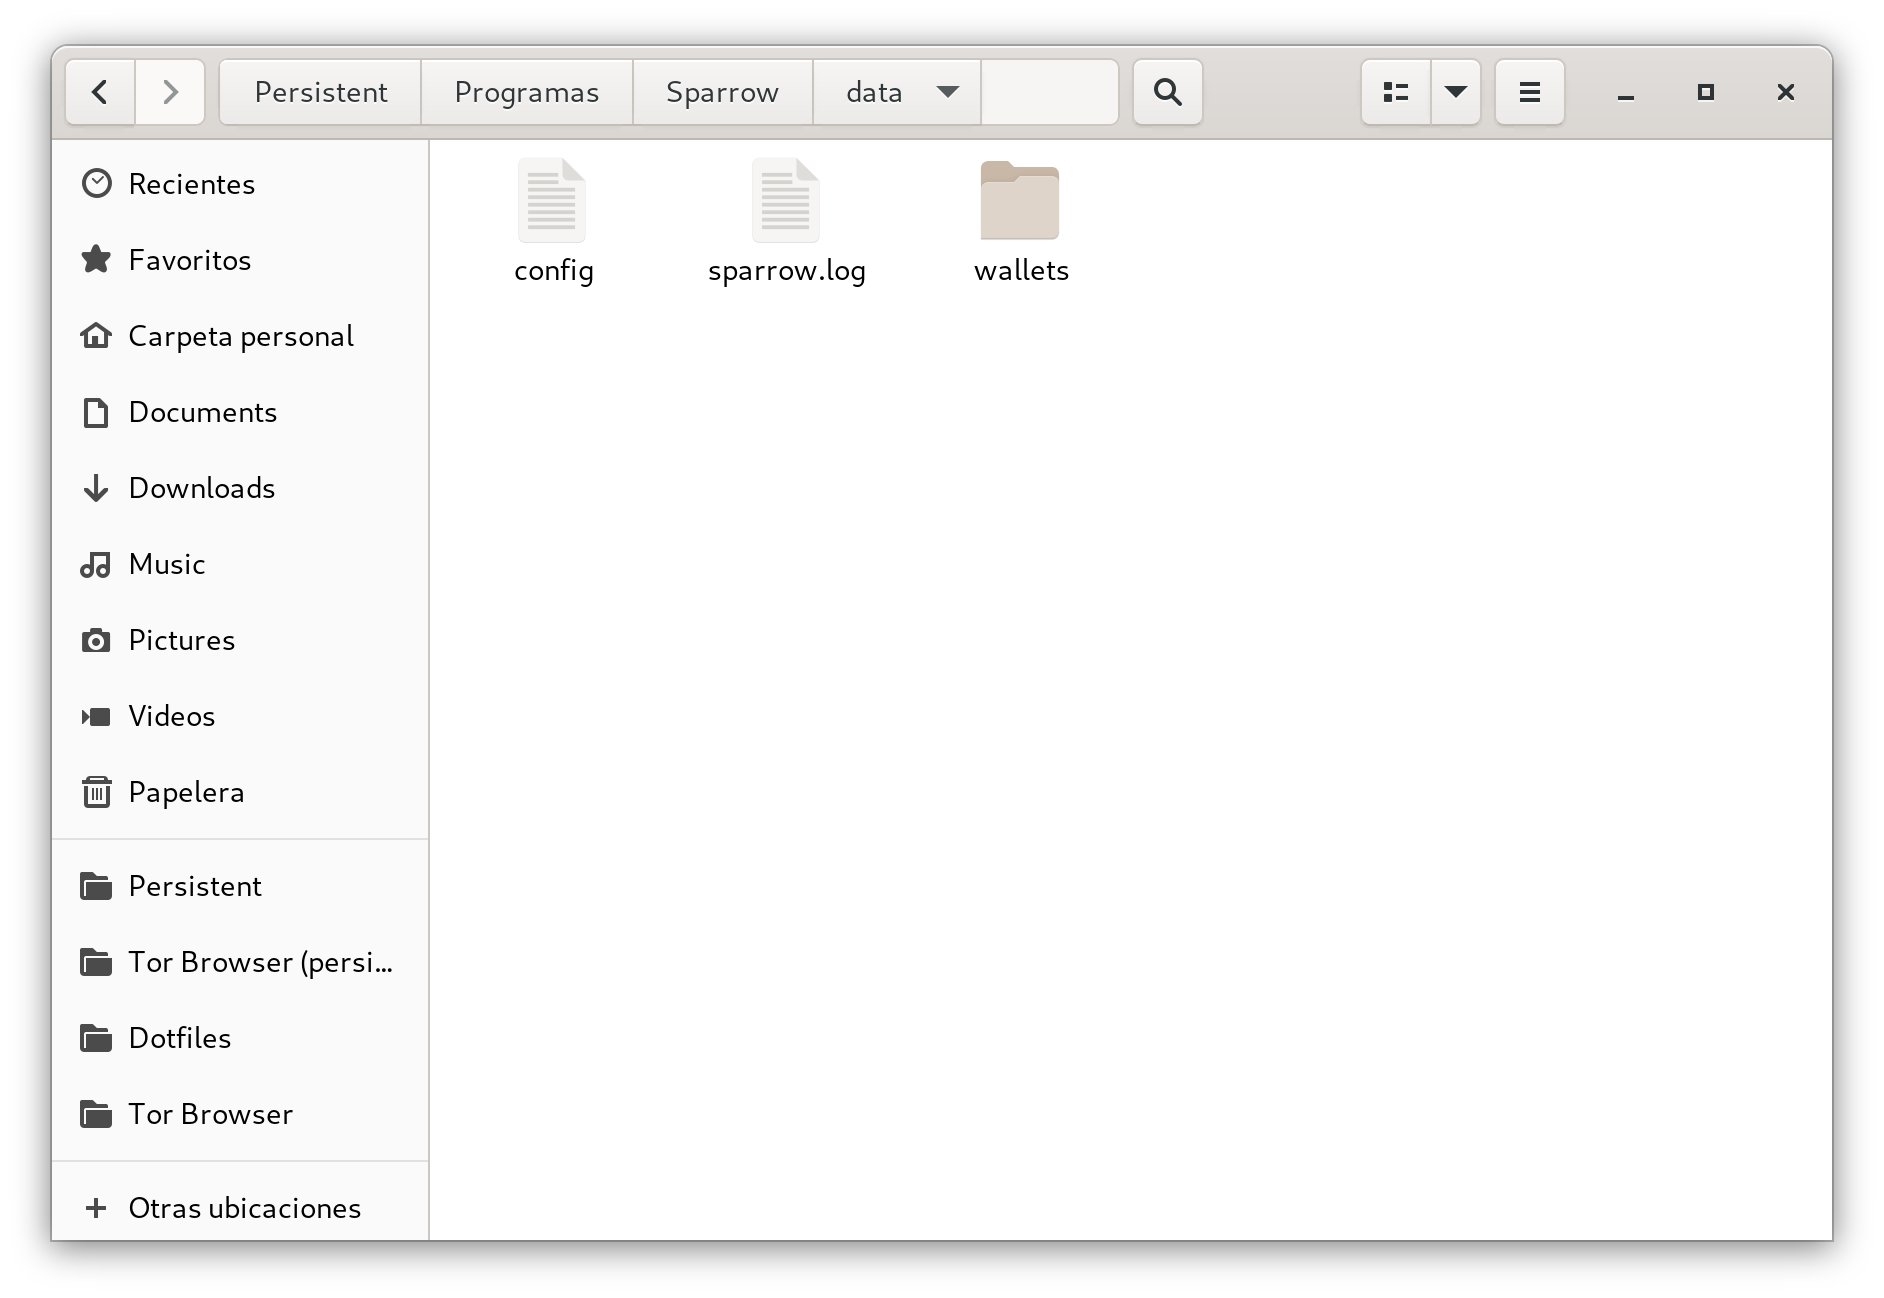
Then make sure that in the folder ~/Persistent/Programas/Sparrow/data, some files have appeared (the classic ones from the Sparrow configuration).
If you’ve reached this point and everything above has gone well, it’s time to restart the machine.
Once you restart, log in by unlocking the persistent storage first. Connect to the Tor network and finally open the TailsOS applications. You will see the Sparrow icon, and once you click on it, Sparrow will open with the stored configuration.
Update sparrow on tailsos (future upgrades)
This section applies exclusively to future updates of Sparrow Wallet once it has already been properly installed in the persistent storage of TailsOS.
It is not part of the initial installation process.
Each new version must be downloaded in Standalone format, always verifying its integrity and signature before proceeding.
After extracting the .tar.gz file, the usual folders will appear:
binlib
The previously configured persistent directory is:
~/Persistent/Programas/Sparrow/To update correctly:
- Delete the existing
binandlibfolders. - Copy the new version’s
binandlibfolders into the persistent directory. - Keep the
datafolder.
The data directory contains wallets, configuration files, labels, and metadata. Deleting it would result in losing the previously configured environment.
As a conservative measure, the previous installation can be renamed before copying the new version.
Conclusion
We have set up Sparrow on TailsOS to keep it running in persistent storage and avoid installing it every time we start the system.
To create this article, I have referenced these threads:
- https://forobits.com/t/tails-como-so-para-cryptomonedas/45506/6
- https://forum.blocktrainer.de/t/anleitung-tails-linux-mit-sparrow-wallet/28775
🖖 If this article has been helpful to you, please share to help others.


I tried following this guide. It mostly works but I can’t seem to get the application to show up in the applications. I can run it from terminal though. Thanks for the guide!
Hi Sovtoshi, I think you missed a step, try to follow the whole guide again. I have tested it and it’s working on my side.
Thanks for the reply. I’m wondering what the options are, for people in third world countries? Where they wouldn’t necessarily have good options – or ANY options – for purchasing signing devices.
What are some other options? Maybe not perfect, but decent. I’m guessing that the most common choice would be phone apps.
You can always use an old phone without Internet access as an offline signing device, or maybe an old computer (also without Internet/Wifi, Bluetooth, etc). For mobile phones, there are some Android distributions that let you disable wifi and data. Some Krux devices are under $40. You can also buy second hand Raspberry Pi Zero and some spare parts to assemble a SeedSigner
Regarding “Do not use this method if you are storing seeds in Sparrow”…
If you’re using this as a very “cold storage” vault, and won’t need to sign transactions very often, what do you think of the option of just creating a new hot wallet in Sparrow every time you need to sign a transaction? So you’d have to type in your seed phrase again, but that’s not a big deal, just 12 words.
Drawbacks?
It just seems like the hardware wallet comes with it’s own problems.
Hi PersistentAnchovy, the risk of creating the hot wallet every time is that you are placing your seed (access to funds) in a device that has internet access, memory, etc… I’d not recommend that.
For a more secure way to sign transactions, use an air-gapped device like SeedSinger, Krux, Jade, etc. I’m planning a new article on how to sign air-gapped transactions with the SeedSigner.
Hi Daniel,
This was the guide I have been looking for. Thank you so much.
I help a lot of people set up their wallets and really try to teach them about privacy and not to rely on exchanges and any KYC. Especially with people in strict countries this is very useful.
I dont want to give my email, even a burner, as overall I try to avoid it. Perhaps for a contact you could include a SimpleX address, Nostr Pubkey or even a Signal username? I just really want to move on from email for communicating.
I wanted to tip you in Satoshi and noted your coffee machine project. That is really awesome. I spend about 5 mins trying to find a QR code to scan and send. Nothing obvious was liked anywhere apart from a QR code that comes up when you scroll. This links to a Wallet of Satoshi custodial wallet? Will send some there in the hope it gets to you. Comment welcome….
Hi! I’m glad you’ve found this article interesting 💪 got your sats 🙌
Thank you for your ideas, I’ll add a QR on the footer for improving visibility and consider adding a SimpleX address!
Thank you for this tutorial! It was very easy to follow. I have a question though. After following the steps, my Sparrow App looks like it’s from the 80’s and doesn’t look like the app when I download it on my Mac or even from the images posted in this tutorial. Am I missing something to make the app look normal?
Hey Zach, from my experience, the Sparrow app looks the same on any OS. Please check you are downloading the latest version and also verify the integrity of the downloaded files.
There is no option to change the look & feel of the app, maybe is your OS that is doing something weird 🤪
Same weird UI here. I downloaded and verified (all went well). I ran Sparrow normal via double click, and it opened like a charm. But after your step to test it via -d command. For somehow, the UI now opens as Swing Terminal Frame.
Make sure you’re not downloading the Server Version. But the Desktop instead!
Good idea, will add the “desktop” version to the article. Thank you 💪
Excellent guide!! Why “Do not use this method if you are storing seeds in Sparrow.” What is the risk? Where should I sign the transactions? Thank you!
Hello Agustin, storing seeds in persistent storage or any PC is really dangerous. Imagine somebody having access to your PC, they’ll probably get your funds. In my opinion the most secure way to sign transactions is to use a hardware wallet.
You can use Sparrow with a hardware device 💪
Your’re totally right Daniel, but there is a way that you can encrypt your seed words using this SeedAlias project. If you want to give it a try I appreciate, thanks for your post!
https://github.com/joaovic/seedalias
Hey João, seems like a very nice project! I personally recommend not to save seed words or private keys into the same device that uses a wallet, encrypted or not as this could escalate to a security issue… Better to have them on an air-gapped hardware device or similar.