SATOFFEE⚡️ Lightning Coffee
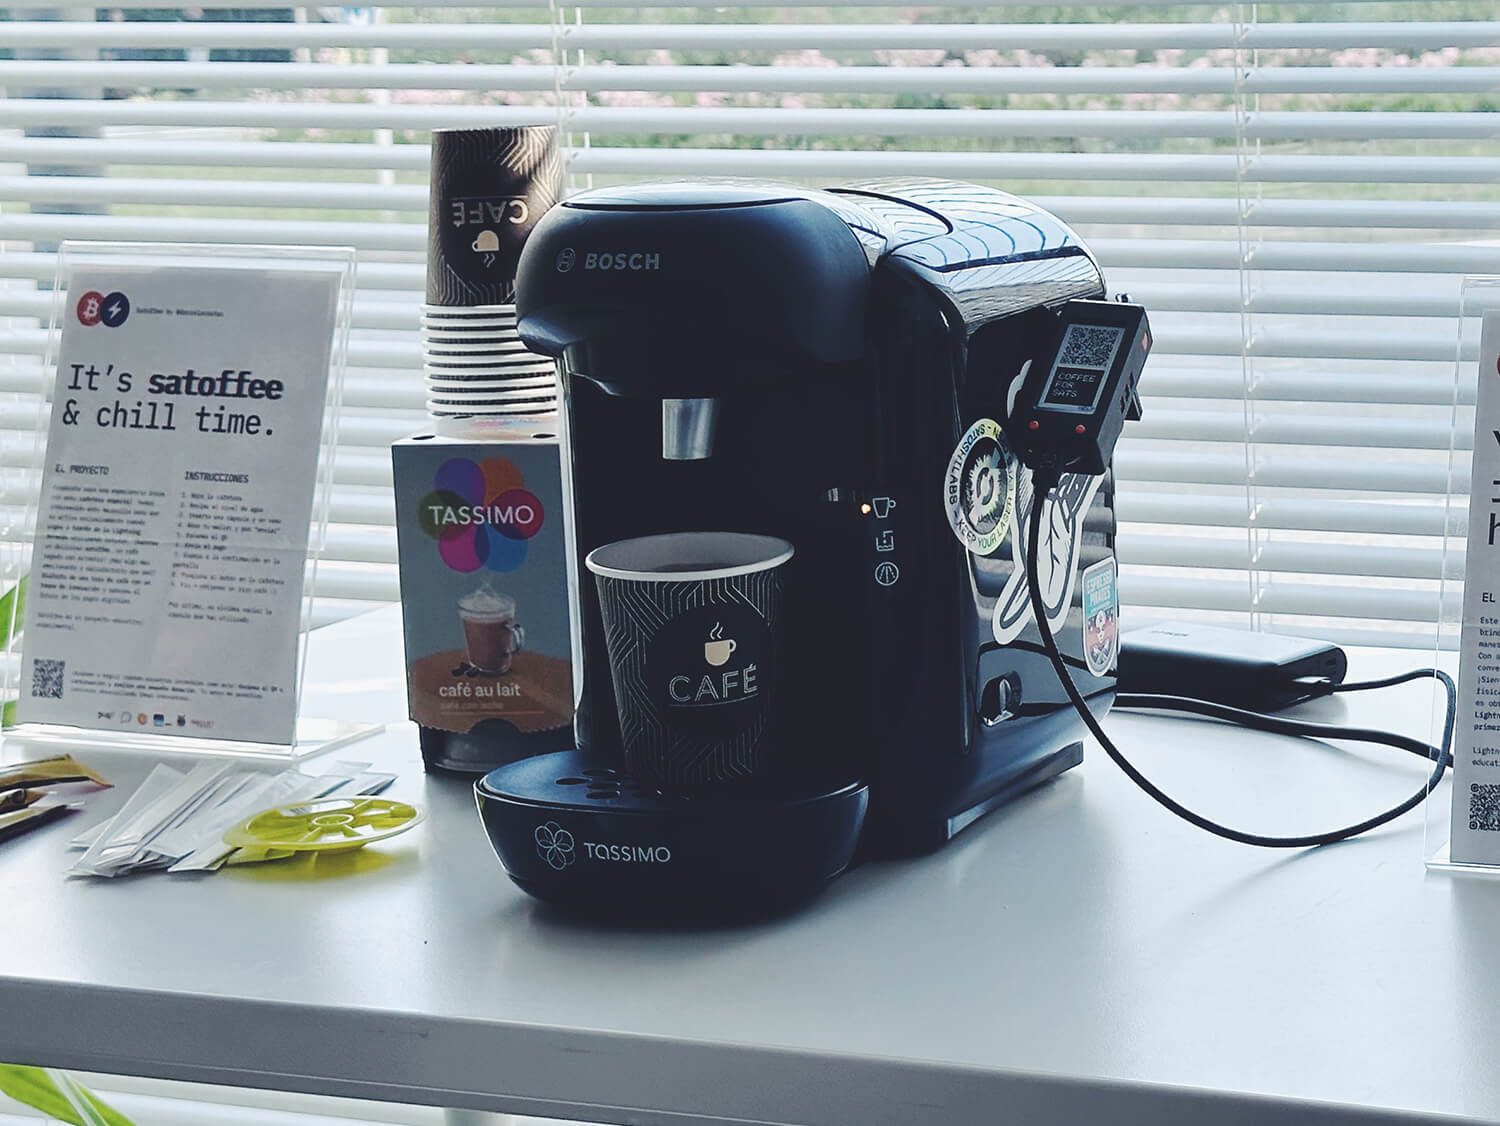
Satoffee⚡️ (Satoshi + coffee) is the name of this project that consists of a home coffee maker activated by payments made with Bitcoin using the Lightning Network. Can anything be cooler than this?
In broad terms, what I have done is a small hack to the coffee maker to disable the only button it has, which is the coffee serving button. That button is then enabled with the help of a relay controlled by a small ESP32 controller.
The basic operation of the controller is based on BitcoinSwitch by Ben Arc, the creator of LNBits.
The goal of this project is to demonstrate a possibility of connecting Bitcoin payments with the physical world.

Value 4 value⚡️
If the content has been useful to you, please consider supporting me so that I can create more articles like this. Lightning address (only for Lightning payments): [email protected]
Materials
- A coffee maker to hack
- Lilygo T-Display-S3 (~€24)
- Lilygo T-Display S3 Shell (~€7)
- 5V Solid State Relay / 1 Way Low (~€2)
- A piece of Velcro to attach the device (~€1)
- JST-SH 1.0MM connectors, 4P, 100MM (~€1)
- Cables
- Toggle switch, 3 pins, 2 positions, SPDT
- USB-C cable
- Soldering iron, solder, screwdriver, etc.
Hacking the coffee maker
Starting to write about this project and reviewing Twitter, I realized that the idea for the project began to take shape there in October 2022, and the project has materialized in June 2023, almost 8 months later…
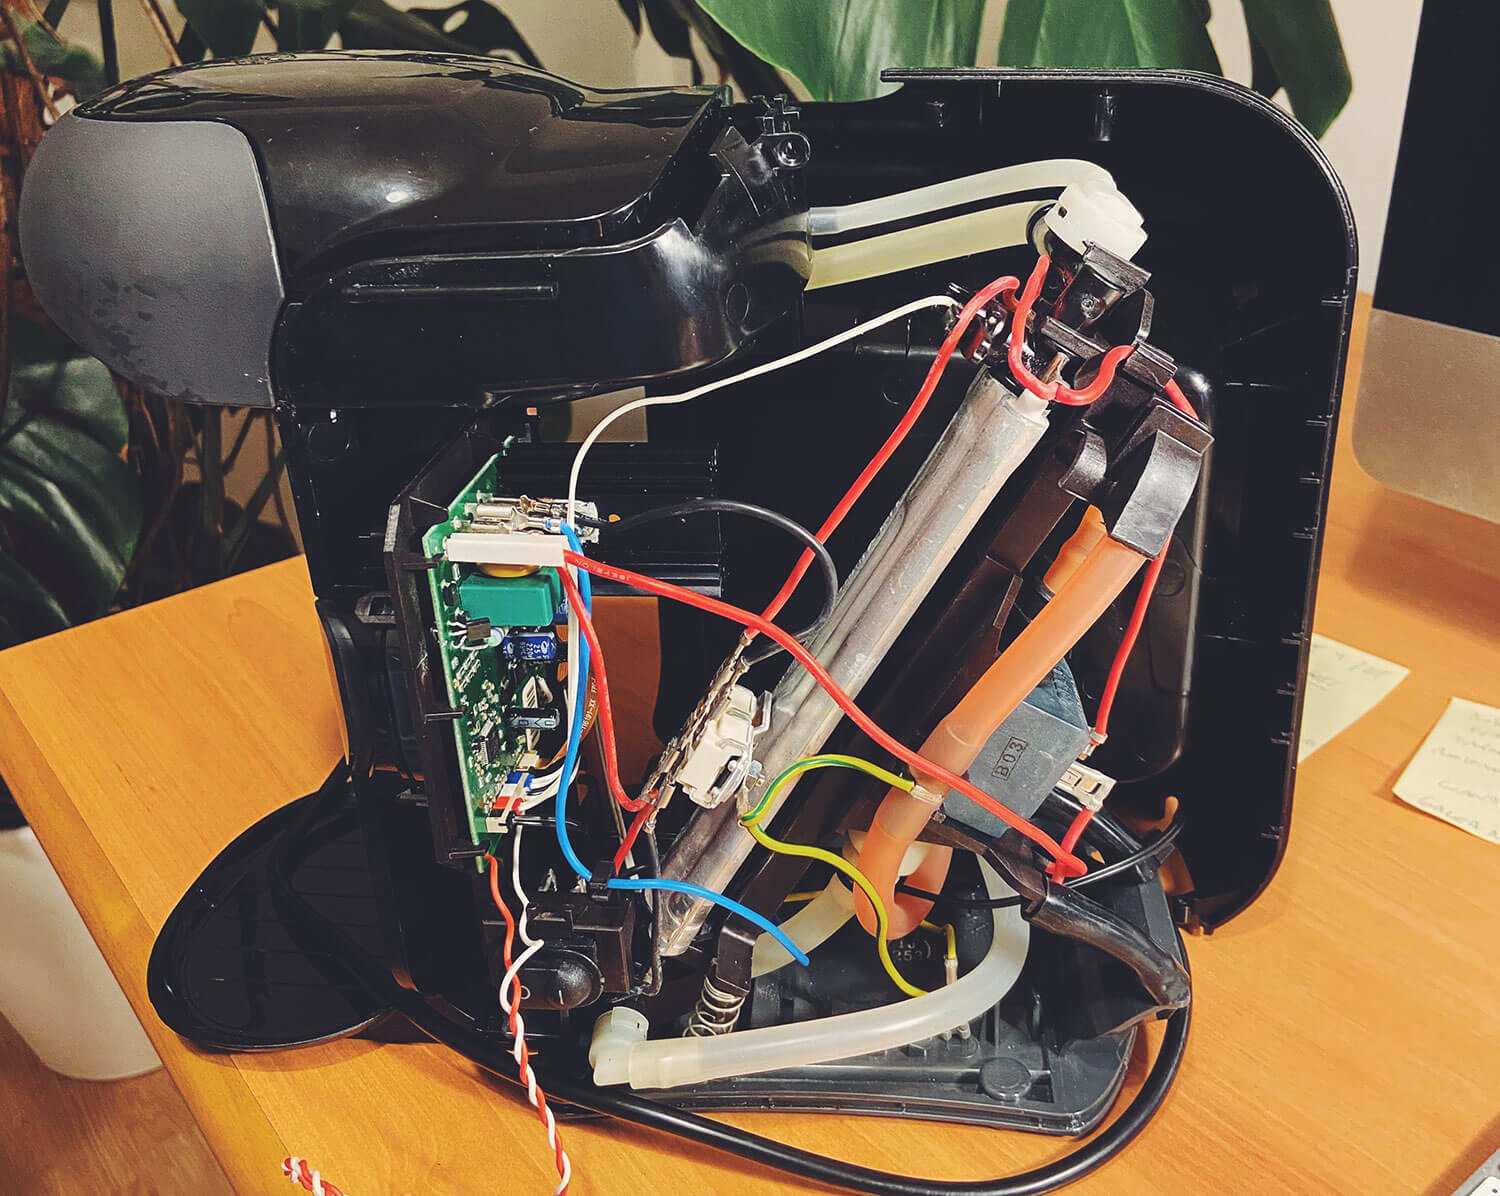
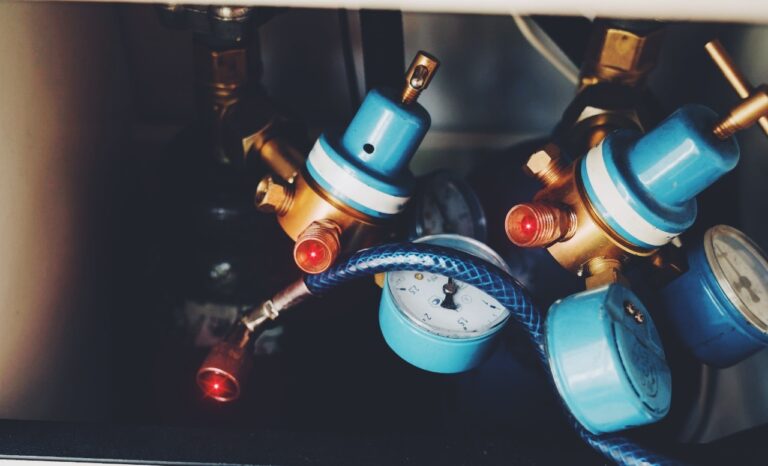
The first thing we’re going to do is hack the coffee maker, which is both the most exciting and the most challenging part… For this, I used a Bosch Tassimo 1202 that I had stored at home.
⚠️ Electrocution hazard
Do not attempt this part if you do not have electrical knowledge, as you can risk your life, and honestly, it’s not worth it. It’s better to leave it to professionals.
Whenever you handle electrical appliances, make sure your installation has a residual-current device (RCD) or ground fault circuit interrupter (GFCI), as it can save your life in case of an electric shock.
I’m not sure if you have ever disassembled plastic devices before, but the same thing happens with all of them: you end up breaking small pieces of plastic. It can also happen that you spend an hour trying to figure out how the hell it comes apart.
Another issue is putting everything back together as it was (believe me), and for that, it’s a good idea to take several photographs from different angles, or every time you unlock a complicated part 😉
⚠️ First and foremost, disconnect the coffee maker from the power source.
The basic step is to look for screws, remove them, and then comes the tricky part—starting to apply some force and figuring out where the structure gives way. For this, you can use small plastic or metal tools to avoid injuring your fingers or using screwdrivers that may damage the plastic.
Once you have the coffee maker disassembled, it’s time to investigate how the button is connected and determine the control voltage. This is also a good time to think about how you want to hack the button, whether you want to use it in the future without payments (bypass or disabling), etc.
The bypass or disabling: Essentially, it involves a small lever that deactivates the coffee maker hack. Remember that it’s a home coffee maker, and there may be times when you want to serve yourself a cup of coffee without having to pay yourself 😉
Now, let me share two ideas that came to mind when I was working on the hack.
Idea 1 – Software-based button press
In this idea, the basic concept is to hack the button in such a way that it simulates a person pressing the button. It would be the most automated option of all.
However, it has some drawbacks. A home coffee maker typically requires interaction from a person, such as opening it, inserting a capsule, closing it, placing a cup, and ensuring there is enough water.
The problem I see with this idea is that if you imagine someone scanning and making a payment without having completed all the previous steps, the system would work (the button would be pressed through software), but the coffee probably wouldn’t be served. The person would need to go through a series of steps, and if they fail in any of them, undesired situations could occur.
This idea would be ideal for vending machines or fully automatic coffee makers that require minimal interaction with the user (they do everything, even placing the cup).
Idea 2 – Enable the button through software
This idea was chosen to avoid all the aforementioned problems since we are working with a home coffee maker and not a fully automatic one.
The person must go through all the steps before making the payment, ensuring that if any step fails, they would still have enough time (40 seconds) to press the button manually.
It is essential to always provide the coffee maker with a small instruction manual that guides users on how to use it effectively.
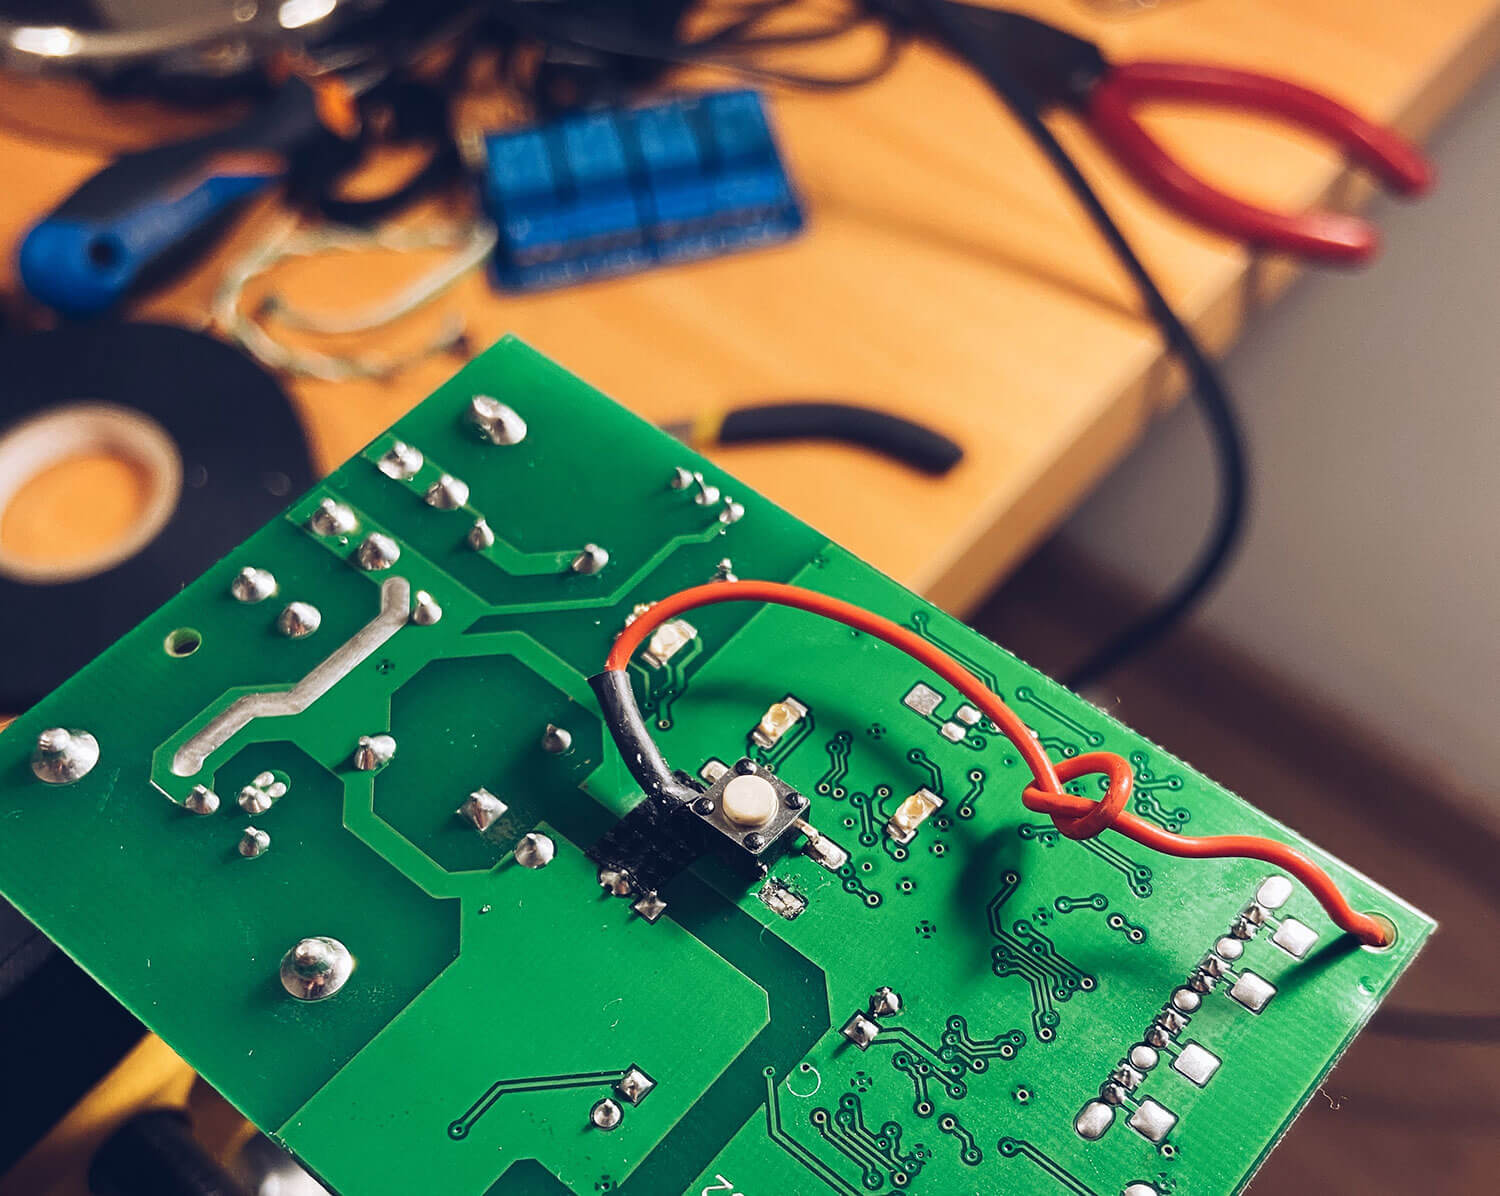
Altering the button circuit
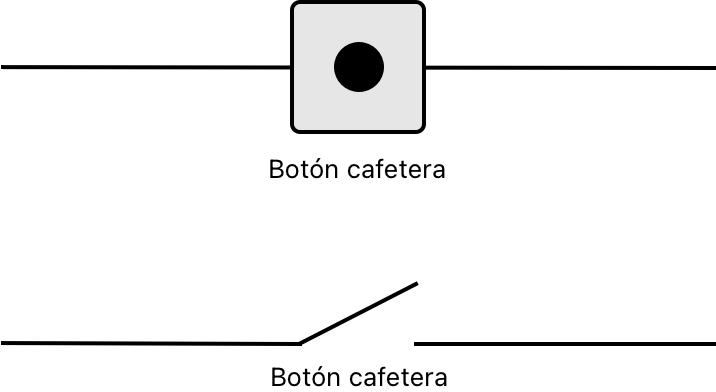
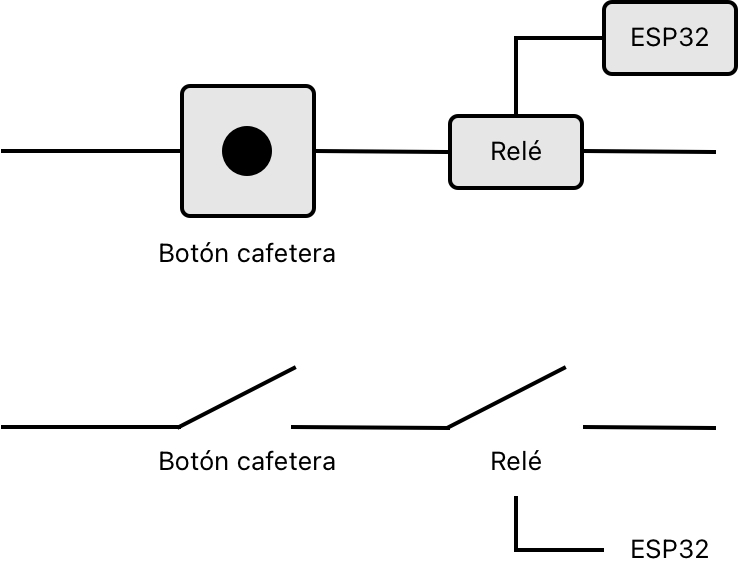
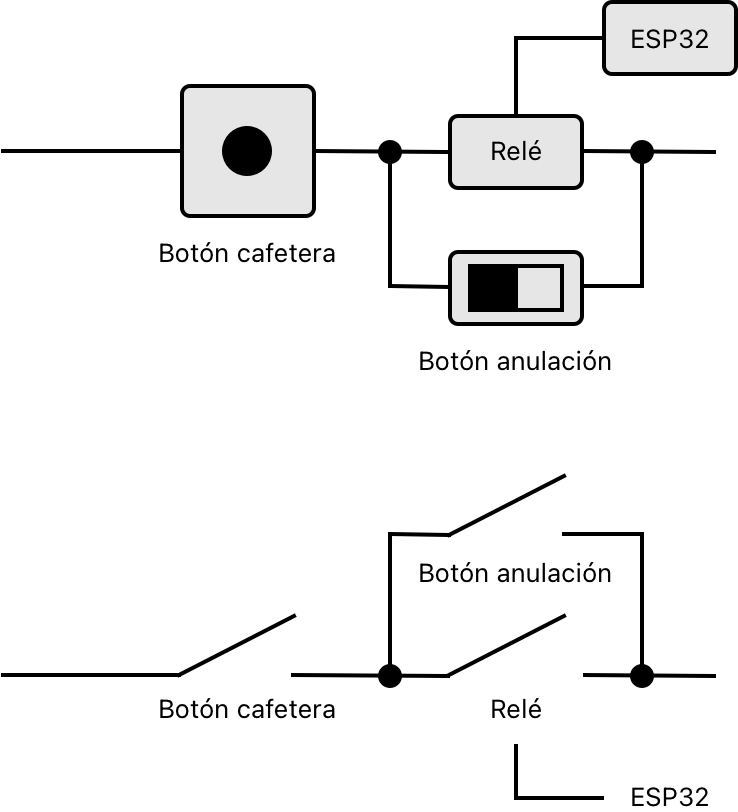
Firstly, let’s explore how the button is connected in the coffee maker and how the future connections would be through some diagrams.
In the first diagram, we see the simple circuit of the button in its natural state, without altering the coffee maker.
In the second diagram, we see the introduction of the relay in series, causing an interruption in the button circuit. This way, if the relay is not activated by the ESP32, the button will have no effect and will remain deactivated.
The third diagram shows the exact same circuit as before, but with the addition of the bypass or disabling of our control circuit. This will allow us to add a small toggle switch on the coffee maker to completely bypass the hacking and use our coffee maker in its original domestic mode again (so we don’t get kicked out of the house).
Images of the project under construction showing the button hack on the coffee maker’s board, the toggle switch installed on the back of the coffee maker, and an internal view of the coffee maker nearly assembled.

Initial Prototypes
To reach the final product, the project has gone through several prototypes, conducting hardware and software tests.
Initially, the project started with a budget-friendly ESP32, an external LCD screen, a mechanical relay module, and many connections.
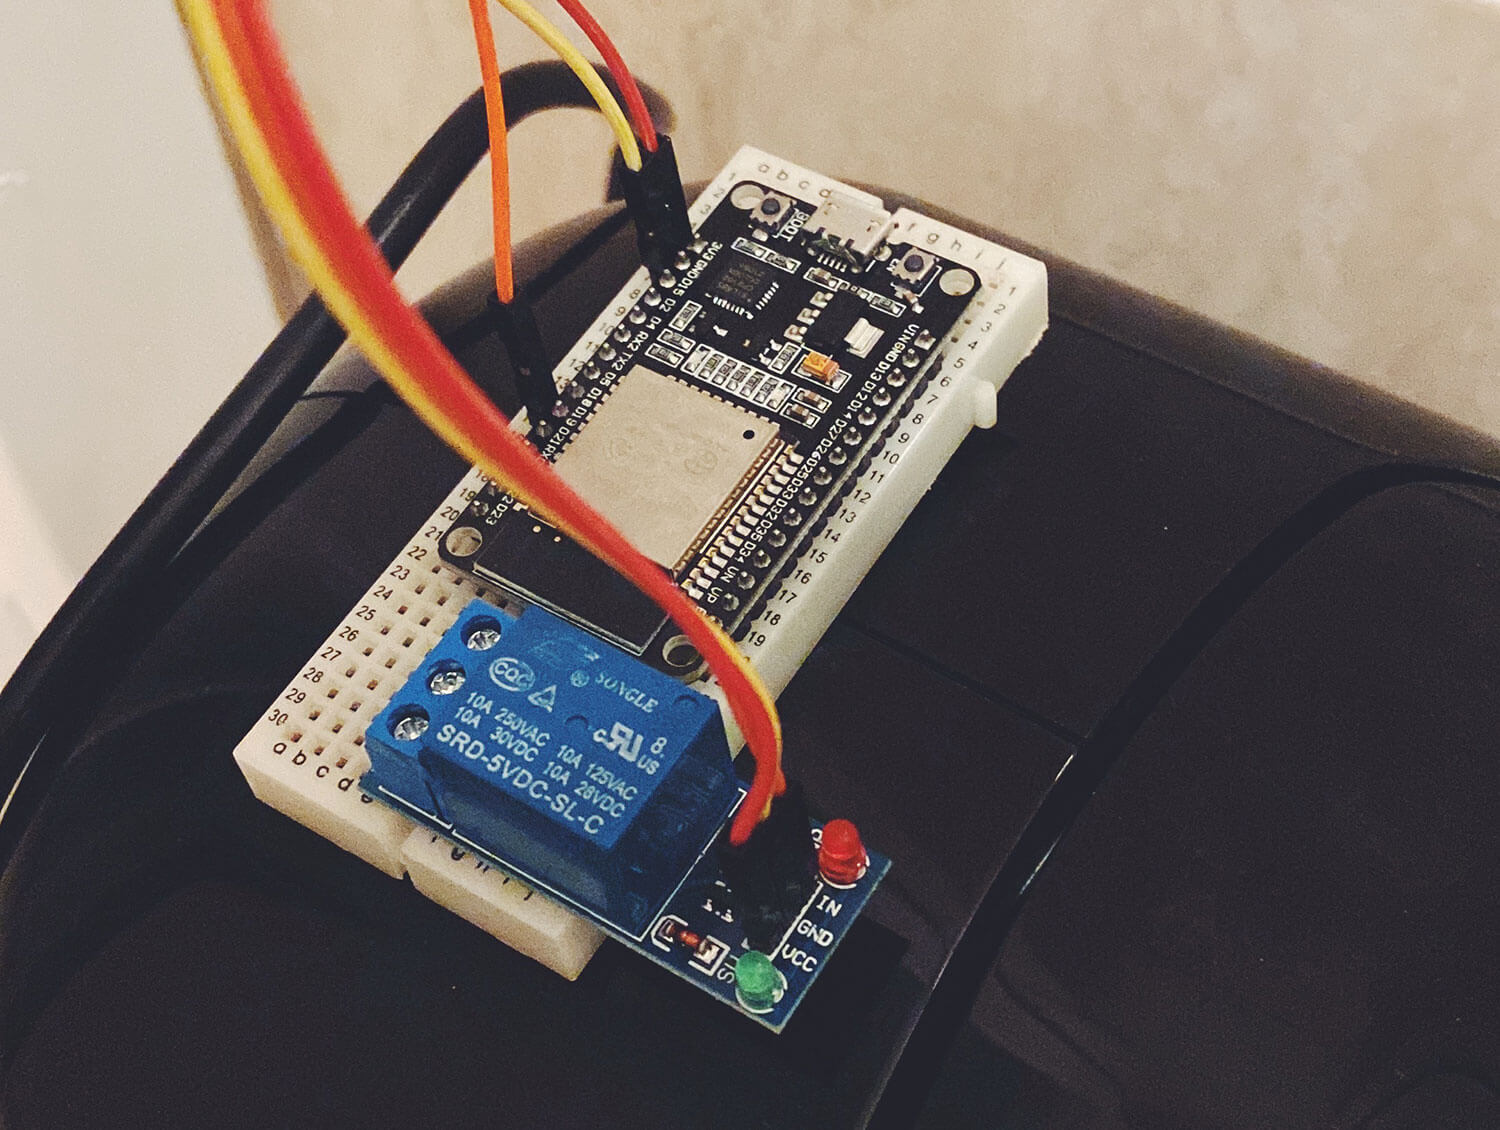
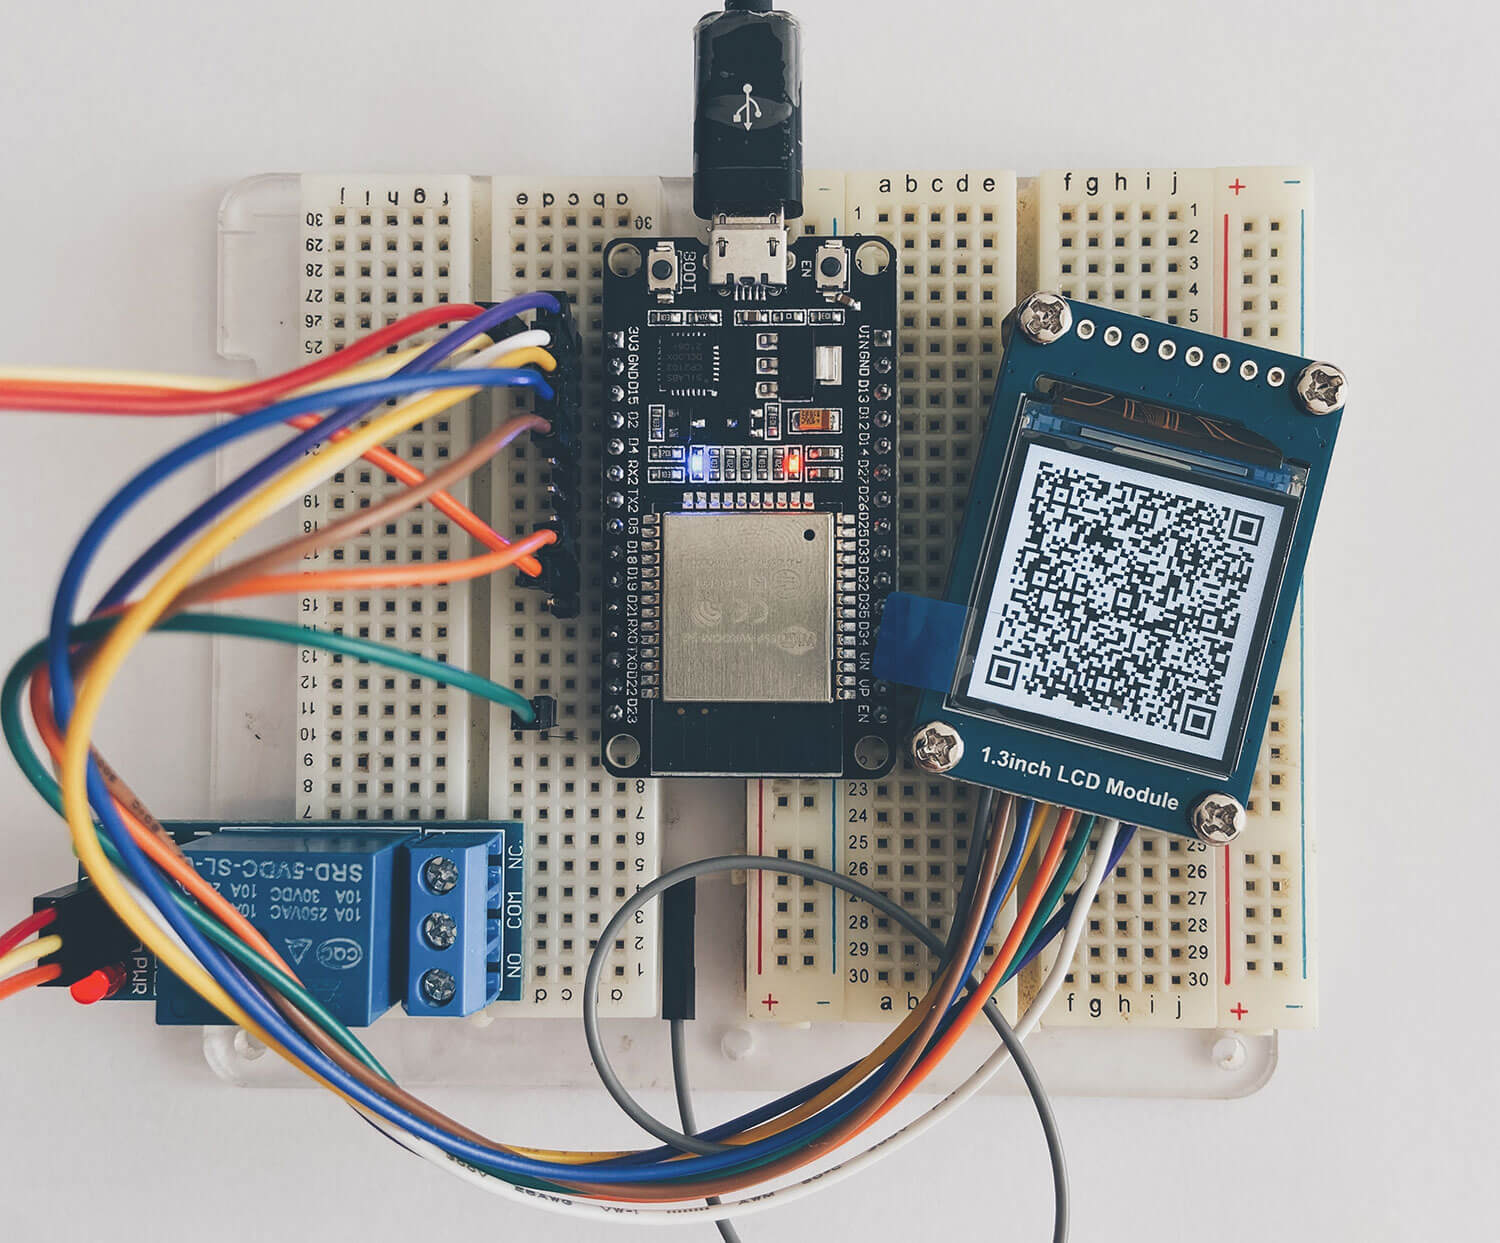
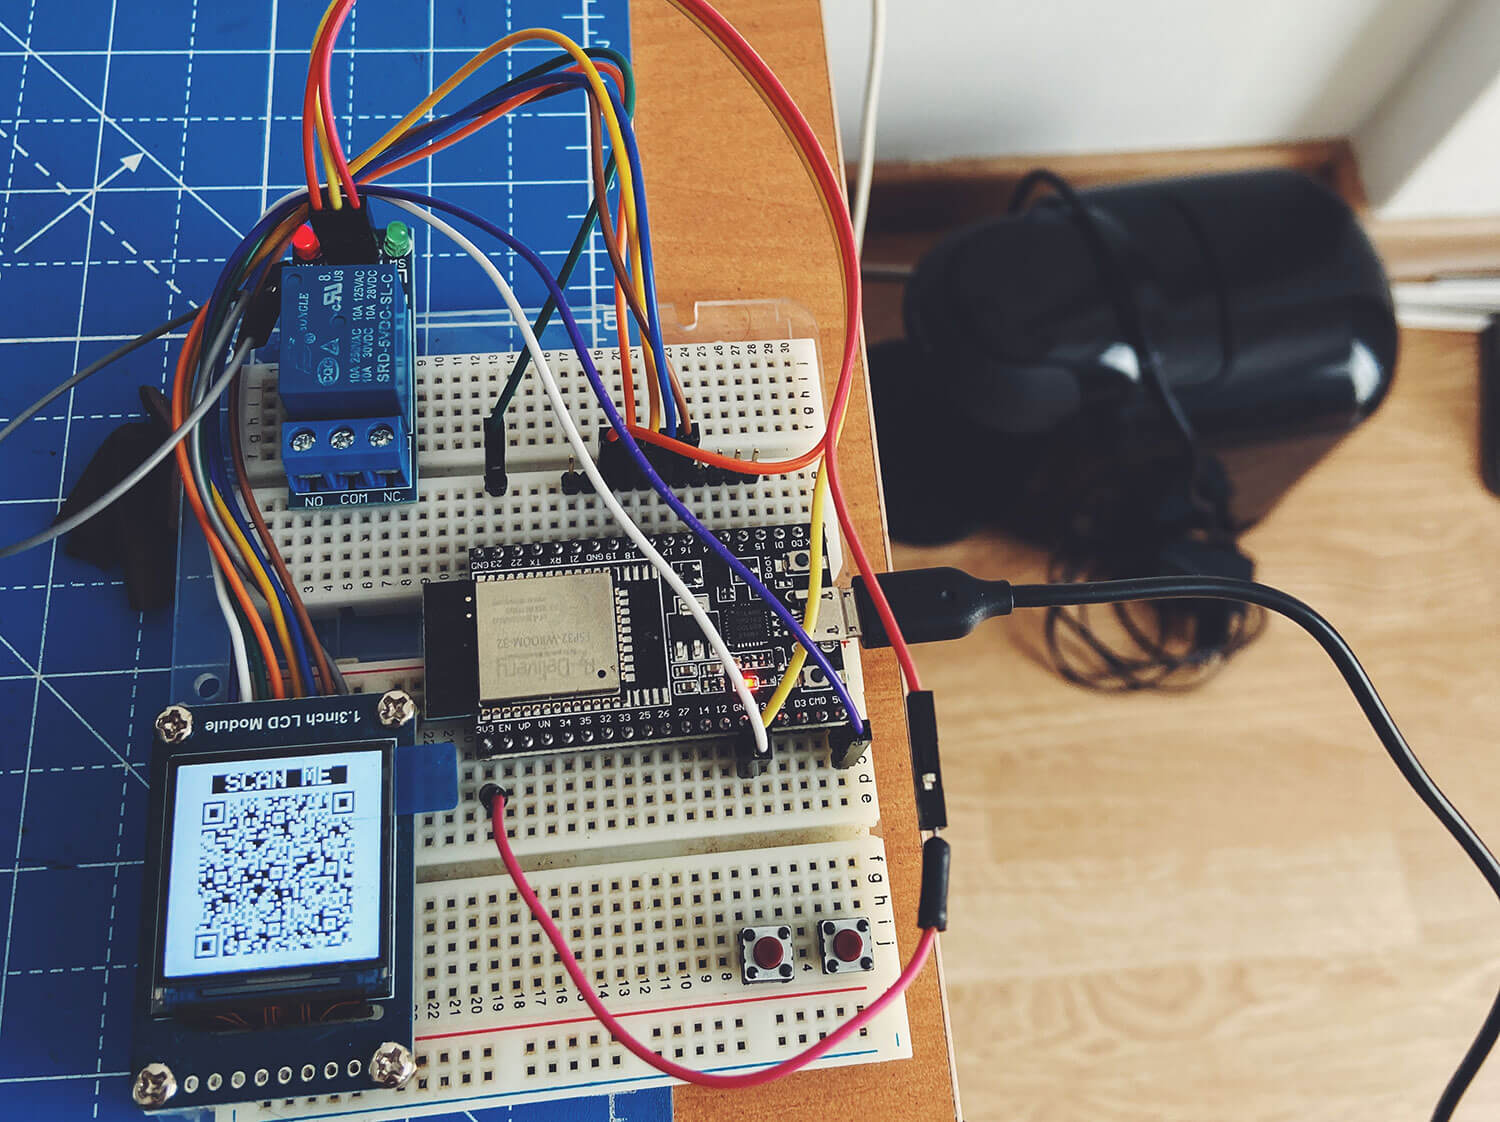
One of the major problems, as you can see in the photos, is the amount of cables and devices required for the initial prototypes. The goal was to compact and simplify the entire device to make it more attractive and functional.
I also wasn’t sure how to integrate all of that into the coffee maker… Would I create a specific PCB for it? Would I dive into that realm without having ever created one before?
The answer was yes. I started studying and creating some designs to make a PCB, but of course, that wouldn’t solve all of my problems…
Final Prototypes
After exploring various paths and alternatives without fully convincing me, the Liligo S3 Display came along. This wonderful machine already comes with an integrated screen and two buttons, as well as a small connector with two GPIO pins.
This discovery solves many of the previously mentioned inconveniences, and you even have the option to purchase it with a cool casing. I no longer needed to design or produce a PCB, saving me several components, reducing the size, and improving the final design of the product.
Software
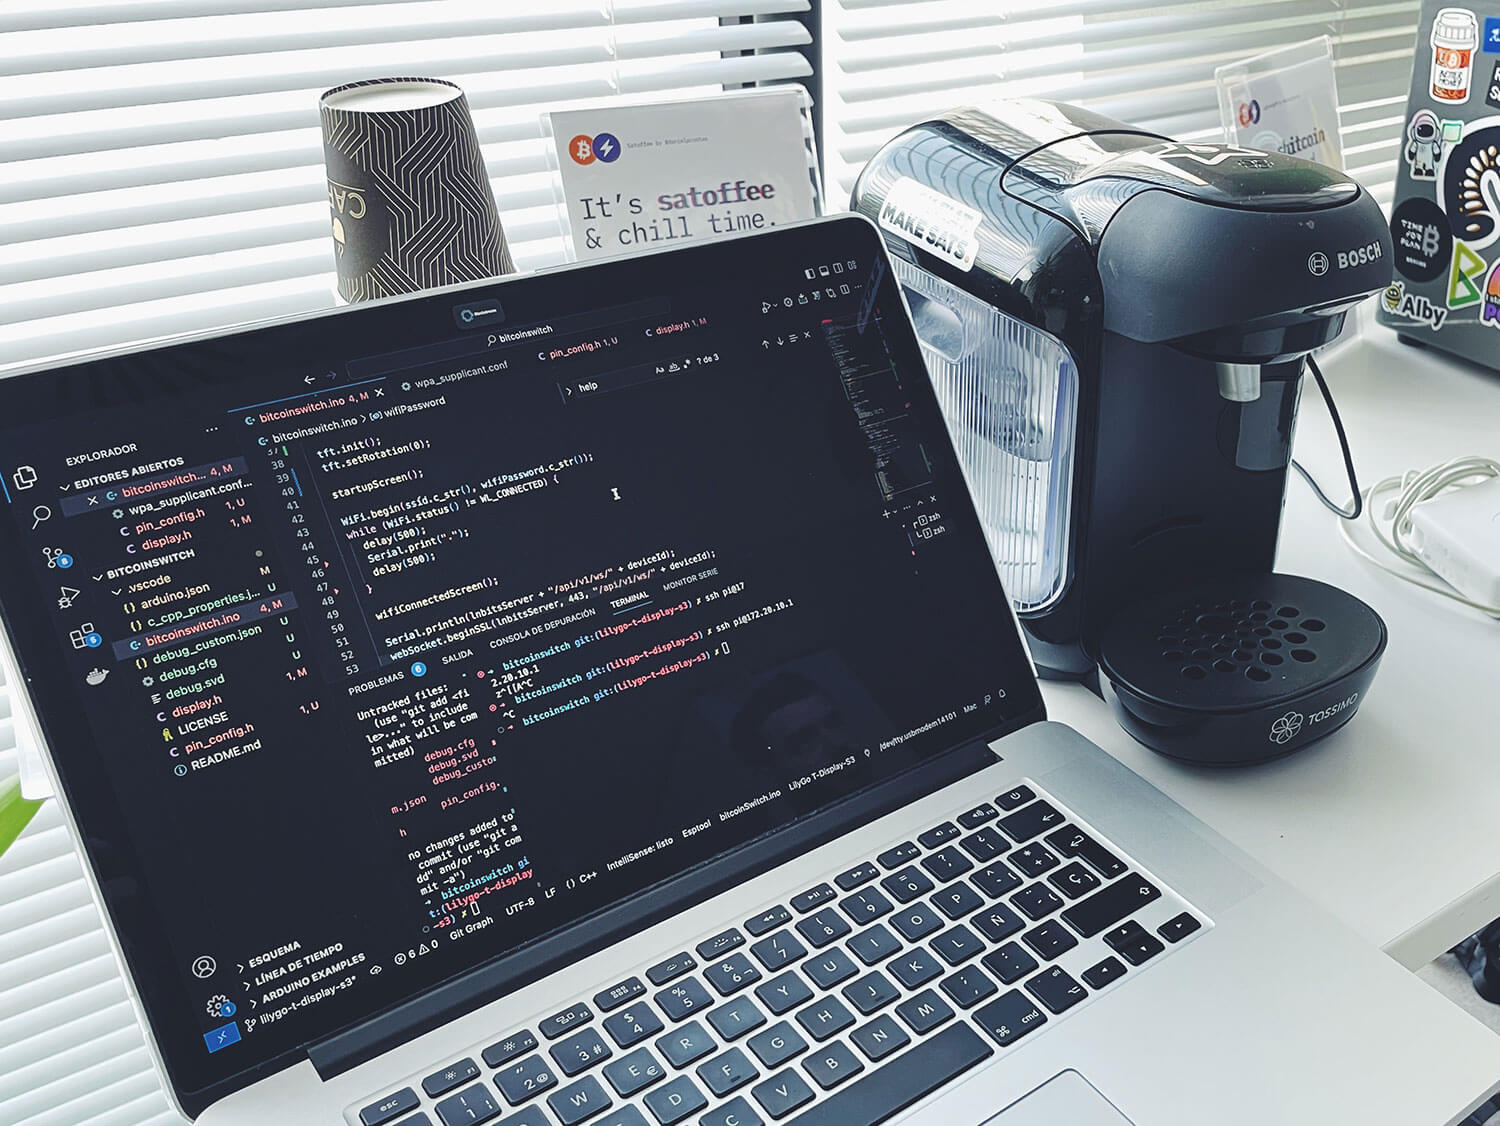
The software used was based on Ben Arc’s BitcoinSwitch project.
Initially, I rewrote the project to add a display and use it with BTCPay Server, but the results were not as expected. It took a long time to detect payments, and I wanted it to be instant.
To give you a general idea of the software, it displays a QR code on the screen, and once a successful payment is made, the relay is activated, subsequently activating the coffee maker for use. Sounds simple, right?
Once again, I rewrote almost the entire project to interact with LNBits and an amazing extension called LNURLDevice.
Taking it up a notch, Satoffee⚡️ connects to LNBits using websockets, maintaining a real-time connection. If a payment is detected, the relay is instantly activated for 40 seconds.
Here’s a small demonstration of some screens included in the software.
LNBits setup
Satoffee⚡️ is connected to LNBits using the LNURLDevice extension. This allows you to “create” a device in LNBits that you will “activate” through a payment to an LNURL.
The steps you need to follow are:
- Install an instance of LNBits connected to your node (or alternatively use legend.lnbits.com, which is the test server).
- Sign in and create a wallet (if you haven’t done so already).
- Install the LNURLDevice extension.
- Create a new device and fill in the information.
- Title: satoffee-test
- Wallet: your-wallet
- Fiat currency: EUR
- Type: switch
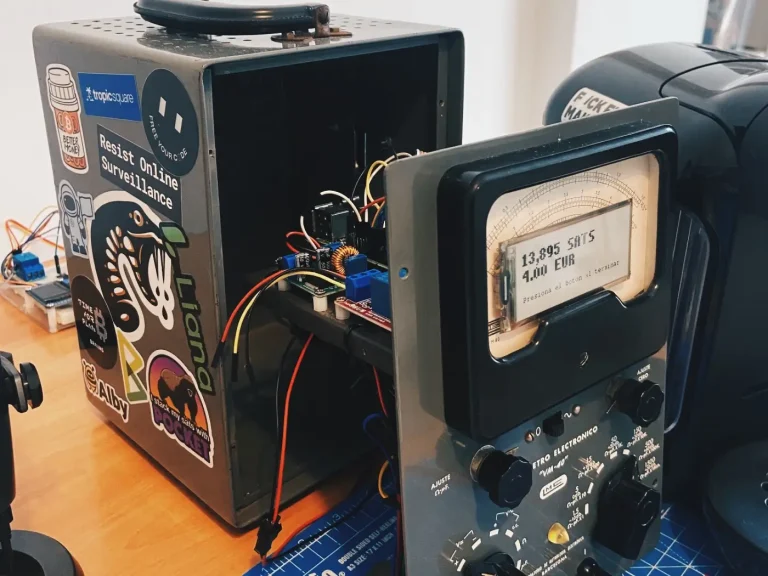
- Amount: 2 (2 EUR)
- Duration: 40000ms (40s)
- GPIO pin: 44
Flashing the ESP32
To flash the software on the LILYGO T-Display-S3 you can use Chrome browser from your computer following the instructions at https://satoffee.danielpcostas.dev.
Keep in mind that if you change the amount or the time of the device in LNBits, this will generate a new QR and you must load the new LNURL value again (you can use https://satoffee.danielpcostas.dev).
Check the full code on Github.
Satoffee⚡️ doing its job
The following video shows a complete interaction with the coffee maker. You can see how, upon scanning and paying a Lightning invoice, the coffee maker is activated, and it serves the coffee.
The coffee serving button on the coffee maker is disabled until the payment is made. Once enabled, it remains active for 40 seconds, which is enough time to serve the coffee and allows pressing the button again to continue dispensing coffee (in case you want to add more water).
Future implementations
After completing the first prototype, I have come up with some future modifications to consider for implementation, including:
- ✅ Incorporating configuration options through web browser
- ✅ Allow using the device horizontally or vertically
- Adding a rechargeable Li-Po battery inside the casing
- Customizing on-screen messages
- Creating a kit with all the necessary materials for assembly at home
- Any other ideas that come to your mind?
This article will be updated with new changes and updates as they are applied to the project.


Wow! I need your kit to introduce sats to my neighbors
🙏 Thanks! I thing that soon I’ll release an easier version and a DIY kit with all the materials.
This is a perfect tool for introducing new people in Bitcoin 🙌